Нет описания правки Метки: Визуальный редактор apiedit |
(Исправлены ошибки и добавлены некоторые переводы.) Метка: Визуальный редактор |
||
| (не показаны 33 промежуточные версии 10 участников) | |||
| Строка 1: | Строка 1: | ||
| − | {{Заготовка}} |
+ | {{Заготовка}} |
| − | Ниже |
+ | [[Файл:The_skill-tree.png|thumb|Самый распространённый вариант панели прокачки.]]Ниже представлены различные типы сборок улучшений для разных танков. Они используют все 33 очка улучшения, которые можно получить после прокачки всех 45 уровней. |
| − | Большая часть сборок |
+ | Большая часть сборок создана под определенные танки, не перепутайте их.[[Файл:Дерево развития.png|thumb|354x354px|Официальное древо танков, которое можно открыть в игре нажатием на английскую клав. Y (рус. Н)|left]] |
| + | [[File:Twin-1.png|left|thumb|45x45px]] |
||
| − | ==Ветка [[Twin]] 'ов== |
||
| + | ==Ветка [[Twin]]'ов== |
||
| − | {| class="wikitable sortable mw-collapsible mw-collapsed" style="width: 100%" |
||
| + | |||
| + | {| class="wikitable mw-collapsible mw-collapsed" style="width: 100%" |
||
|- |
|- |
||
! Танк |
! Танк |
||
! Название сборки |
! Название сборки |
||
| − | ! Сборка |
+ | ! width="20%" |Сборка |
| + | ! Описание |
||
| − | ! Description |
||
| − | ! Голосование |
||
|- |
|- |
||
| '''[[Twin]]''' |
| '''[[Twin]]''' |
||
| '''''Универсальная''''' |
| '''''Универсальная''''' |
||
| '''[[Файл:Screenshot_1.png|thumb]]5, 4, 0, 2, 5, 7, 7, 3''' |
| '''[[Файл:Screenshot_1.png|thumb]]5, 4, 0, 2, 5, 7, 7, 3''' |
||
| − | | При таком количестве пуль их |
+ | | При таком количестве пуль их скорость не важна. Эта сборка предназначена для всех танков, которые прокачиваются с Twin'а. Так или иначе, вы так же можете игнорировать прокачку танка и оставаться на обычном Twin'e. |
| − | | <poll> |
||
| − | Это хорошая сборка? |
||
| − | Да |
||
| − | Нет |
||
| − | </poll> |
||
|} |
|} |
||
| + | === === |
||
| + | [[File:Triple shot-0.png|left|thumb|35x35px]] |
||
| − | === [[Triple Shot| |
+ | === [[Triple Shot|Тriple Shot]] (не предельный ярус) === |
| + | {| class="wikitable mw-collapsible mw-collapsed" style="width: 100%" |
||
| − | |||
| − | {| class="wikitable sortable mw-collapsible mw-collapsed" style="width: 100%" |
||
|- |
|- |
||
! Танк |
! Танк |
||
! Название сборки |
! Название сборки |
||
| − | ! Сборка |
+ | ! width="20%" |Сборка |
! Описание |
! Описание |
||
| − | ! Голосование |
||
|- |
|- |
||
| '''[[Triple Shot]]''' |
| '''[[Triple Shot]]''' |
||
| '''''Больше очков!''''' |
| '''''Больше очков!''''' |
||
| '''[[Файл:Build_Pic_2.png|thumb]]0, 5, 0, 7, 7, 7, 7, 0''' |
| '''[[Файл:Build_Pic_2.png|thumb]]0, 5, 0, 7, 7, 7, 7, 0''' |
||
| − | | Эта сборка |
+ | | Эта сборка сфокусирована на наборе максимального количества очков. Упор сборки сделан на спам, благодаря которому большая часть пуль просто не долетит до вас, а если это все произойдет, ваша прокачанная регенерация быстро поставит вас на ноги. |
| − | | <poll> |
||
| − | Это хорошая сборка? |
||
| − | Yes |
||
| − | No |
||
| − | </poll> |
||
|- |
|- |
||
| '''[[Triple Shot]]''' |
| '''[[Triple Shot]]''' |
||
| '''''Ловец''''' |
| '''''Ловец''''' |
||
| [[File:Build Pic 3.PNG|thumb|159x159px|center|center|This is the build to use.]]'''2, 0, 0, 3, 7, 7, 7, 7''' |
| [[File:Build Pic 3.PNG|thumb|159x159px|center|center|This is the build to use.]]'''2, 0, 0, 3, 7, 7, 7, 7''' |
||
| − | | Сборка |
+ | | Сборка основана на поимке вражеских танков и замедлении из с помощью пуль. <br>Отлично подходит для командной игры.''' Не рекомендуется атаковать дроны!'''<br> |
| − | | <poll> |
||
| − | Is Catcher a good build? |
||
| − | Yes |
||
| − | No |
||
| − | </poll> |
||
|} |
|} |
||
| + | [[File:Penta shot-0.png|left|thumb|35x35px]] |
||
=== [[Penta Shot]] === |
=== [[Penta Shot]] === |
||
| + | {| class="wikitable mw-collapsible mw-collapsed" style="width: 100%" |
||
| − | |||
| − | {| class="wikitable sortable mw-collapsible mw-collapsed" style="width: 100%" |
||
|- |
|- |
||
! Танк |
! Танк |
||
! Название Сборки |
! Название Сборки |
||
| − | ! Сборка |
+ | ! width="20%" |Сборка |
! Описание |
! Описание |
||
| − | ! Голосование |
||
|- |
|- |
||
| '''[[Penta Shot]]''' |
| '''[[Penta Shot]]''' |
||
| Строка 70: | Строка 55: | ||
'''''Стеклянный Кошмар''''' |
'''''Стеклянный Кошмар''''' |
||
| '''[[Файл:Build_Pic_4.png|thumb]]0, 0, 0, 7, 7, 7, 7, 5''' |
| '''[[Файл:Build_Pic_4.png|thumb]]0, 0, 0, 7, 7, 7, 7, 5''' |
||
| − | | Сборка |
+ | | Сборка предназначена для игры по принципу "увидел, попал, убил." Высокий урон даст вам возможность убивать противников с нескольких выстрелов, высокая скорость - быстро уходить. Но будьте аккуратны, ведь любое неосторожное действие может привести в вашей смерти. |
| − | | <poll> |
||
| − | Это хорошая сборка? |
||
| − | Да |
||
| − | Нет |
||
| − | </poll> |
||
|- |
|- |
||
| '''[[Penta Shot]]''' |
| '''[[Penta Shot]]''' |
||
| Строка 81: | Строка 61: | ||
| '''[[Файл:Fdg-0.png|thumb]]2, 5, 0, 5, 7, 7, 7, 0''' |
| '''[[Файл:Fdg-0.png|thumb]]2, 5, 0, 5, 7, 7, 7, 0''' |
||
| Этот билд использует патроны для защиты. Оптимален для игры в команде, как нападающий со спины или защитник. |
| Этот билд использует патроны для защиты. Оптимален для игры в команде, как нападающий со спины или защитник. |
||
| − | | <poll> |
||
| − | Это хорошая сборка? |
||
| − | Да |
||
| − | Нет |
||
| − | </poll> |
||
|- |
|- |
||
| '''[[Penta Shot]]''' |
| '''[[Penta Shot]]''' |
||
| '''''Каскадер''''' |
| '''''Каскадер''''' |
||
| + | |'''[[Файл:Bullet Cascader.png|thumb]]5, 0, 0, 0, 7, 7, 7, 7''' |
||
| − | | |
||
| + | |Полу-защитный стиль, предназначенный, в основном, для поддержки союзников вашими снарядами и защите союзников. |
||
| − | '''[[Файл:Build_Pic_9.png|thumb]]'''5, 0, 0, 0, 7, 7, 7, '''7''' |
||
| − | | A very strategic build. Due to its spread it can be used to lock down a small amount of the map for a few seconds. If you try to shower a low-level tank and it escapes, follow it around as any wrong movement of the enemy tank will be a near-guaranteed instant kill. If you get hit by a high-penetration tank, the Health Regen will help get out. Slow tanks may not be fast enough to escape quickly. Being hit by a bullet barricade released by this build does very high damage and most likely kills you. This build is a more advanced version of The Catcher. |
||
| − | | <poll> |
||
| − | Это хорошая сборка? |
||
| − | Да |
||
| − | Нет |
||
| − | </poll> |
||
|} |
|} |
||
| + | [[File:Spread Shot-0.png|left|thumb|35x35px]] |
||
| − | === Spread Shot === |
+ | === [[Spread Shot]] === |
| − | {| class="wikitable |
+ | {| class="wikitable mw-collapsible mw-collapsed" style="width: 100%" |
|- |
|- |
||
! Танк |
! Танк |
||
! Название Сборки |
! Название Сборки |
||
| − | ! Сборка |
+ | ! width="20%" |Сборка |
! Описание |
! Описание |
||
| − | ! Голосование |
||
|- |
|- |
||
| '''Spread Shot''' |
| '''Spread Shot''' |
||
| '''''Максимальная Эффекстивность''''' |
| '''''Максимальная Эффекстивность''''' |
||
| − | | '''2, 0, 3, 5, 7, 7, 6, 3''' |
+ | |[[File:Spread1.png]] '''2, 0, 3, 5, 7, 7, 6, 3''' |
| Сборка одновременно сфокусированна на атаке и выживании. Ваша способность создавать душ из пуль отлично работает как для атаки, так и для защиты. В сочетании с высоким уроном она может быть сверхэффективной. |
| Сборка одновременно сфокусированна на атаке и выживании. Ваша способность создавать душ из пуль отлично работает как для атаки, так и для защиты. В сочетании с высоким уроном она может быть сверхэффективной. |
||
| − | | <poll> |
||
| − | Это хорошая сборка? |
||
| − | Да |
||
| − | Нет |
||
| − | </poll> |
||
|- |
|- |
||
| '''Spread Shot''' |
| '''Spread Shot''' |
||
| '''''Вертикальная Защита''''' |
| '''''Вертикальная Защита''''' |
||
| − | | '''2, 0, 3, 1, 7, 7, 7, |
+ | |[[File:Spread2.png]] '''2, 0, 3, 1, 7, 7, 7, 6''' |
| − | | Сборка |
+ | | Сборка создана для защиты товарищей по команде. Хорошо использовать а паре с [[Hybrid|гибридом]]. Убийство игроков может вызывать сильные проблемы. |
| − | | <poll> |
||
| − | Это хорошая сборка? |
||
| − | Да |
||
| − | Нет |
||
| − | </poll> |
||
|- |
|- |
||
| '''Spread Shot''' |
| '''Spread Shot''' |
||
| '''''Блокировка''''' |
| '''''Блокировка''''' |
||
| − | | '''1, 0, 0, 7, 7, 7, 7, 4''' |
+ | |[[File:Spread3.png]] '''1, 0, 0, 7, 7, 7, 7, 4''' |
| Защитная сборка, основанная на уничтожении противников рядом с вами. Благодаря высокой скорости пули, противники могут быть ранены еще на подлетах к вам. |
| Защитная сборка, основанная на уничтожении противников рядом с вами. Благодаря высокой скорости пули, противники могут быть ранены еще на подлетах к вам. |
||
| − | | <poll> |
||
| − | Это хорошая сборка? |
||
| − | Да |
||
| − | Нет |
||
| − | </poll> |
||
|- |
|- |
||
| '''Spread Shot''' |
| '''Spread Shot''' |
||
| '''''Мародер''''' |
| '''''Мародер''''' |
||
| − | | '''3, 2, 0, 7, 7, 7, 7, 0''' |
+ | |[[File:Spread4.png]] '''3, 2, 0, 7, 7, 7, 7, 0''' |
| − | | Атакующая сборка, |
+ | | Атакующая сборка, рассчитанная на быстрое убийство. |
| − | | <poll> |
||
| − | Это хорошая сборка? |
||
| − | Да |
||
| − | Нет |
||
| − | </poll> |
||
|} |
|} |
||
| + | [[File:3t-0.png|left|thumb|36x36px]] |
||
| − | === [[ |
+ | === [[Triplet]] === |
| − | {| class="wikitable |
+ | {| class="wikitable mw-collapsible mw-collapsed" style="width: 100%" |
|- |
|- |
||
! Танк |
! Танк |
||
! Название Сборки |
! Название Сборки |
||
| − | ! Сборка |
+ | ! width="20%" |Сборка |
! Описание |
! Описание |
||
| − | ! Голосование |
+ | ! width="40%" |Голосование |
|- |
|- |
||
| − | | '''[[ |
+ | | '''[[Triplet]]''' |
| '''''Неостановимый''''' |
| '''''Неостановимый''''' |
||
| '''[[Файл:Build_Triplet.png|thumb]]1, 4, 0, 7, 7, 7, 7, 0''' |
| '''[[Файл:Build_Triplet.png|thumb]]1, 4, 0, 7, 7, 7, 7, 0''' |
||
| − | | Атакующая сборка, не |
+ | | Атакующая сборка, не рассчитанная на затяжной бой. |
| − | | <poll> |
||
| − | Это хорошая сборка? |
||
| − | Да |
||
| − | Нет |
||
| − | </poll> |
||
|- |
|- |
||
| − | | [[ |
+ | | [[Triplet]] |
| '''''Воин''''' |
| '''''Воин''''' |
||
| + | | |
||
| − | | '''0,7,5,0,7,7,7,0''' or '''0,6,6,0,7,7,7,0''' or '''0,5,7,0,7,7,7,0''' |
||
| + | [[File:Triplet1.png]] |
||
| − | | Эта сборка рассчитана на битву со спамерами, стреляющими большим количеством патронов, и защите от Бустеров-таранов. Если правильно использовать снаряды, то патроны спамер хотя-бы будут блокированы (except for the build above) and at best you will kill them. Due to your high health and body damage when a booster rammer rams you you will both go to low hp, but since they are low enough you can then kill them with your bullet storm. |
||
| + | '''0,7,5,0,7,7,7,0''' или '''0,6,6,0,7,7,7,0''' или '''0,5,7,0,7,7,7,0''' |
||
| − | | <poll> |
||
| − | Is Warrior a good build? |
||
| − | Yes |
||
| − | No |
||
| − | </poll> |
||
|- |
|- |
||
| − | | '''[[ |
+ | | '''[[Triplet]]''' |
| − | | ''''' |
+ | | '''''Стеклянный Ужас''''' |
| + | [[File:Triplet2.png]] |
||
| − | | '''2,0,0,7,7,7,7,3''' or '''1,1,0,7,7,7,7,3''' or '''1,0,0,7,7,7,7,4''' |
||
| + | '''2,0,0,7,7,7,7,3''' или '''1,1,0,7,7,7,7,3''' или '''1,0,0,7,7,7,7,4''' |
||
| − | | Good for chasing enemies and then mowing them down with a tremendous torrent of projectiles. Be extremely careful fighting [[Destroyer]]-type classes as they WILL one-shot you if they manage to hit you. Perfect for fighting tanks that are lower-level, as you can easily hound them and annihilate them quickly. |
||
| − | | <poll> |
||
| − | Is Swift Glass Cannon Of Death a good build? |
||
| − | Yes |
||
| − | No |
||
| − | </poll> |
||
|- |
|- |
||
| − | | '''[[ |
+ | | '''[[Triplet]]''' |
| − | | '''''Regenerative Reaper''''' |
+ | | '''''Regenerative Reaper(рус. Смерть регенерации)''''' |
| + | '''[[File:Triplet3.png]]''' |
||
| − | | '''5/2/0/6/7/6/7/0'''<br />'''4/3/0/6/7/6/7/0'''<br />'''5/1/0/6/7/6/7/1'''<br />'''4/2/0/6/7/6/7/1''' |
||
| + | |||
| − | | High regen while still able to do some major punishment. However, the low Movement Speed means that it will be difficult to chase any enemies. Do not attempt to chase Boosters with this because they will escape or they would lead you into a trap that can get slow tanks killed. |
||
| + | '''5/2/0/6/7/6/7/0''' |
||
| − | | <poll> |
||
| + | |||
| − | Is Regenerative Reaper a good build? |
||
| + | '''4/3/0/6/7/6/7/0'''<br />'''5/1/0/6/7/6/7/1'''<br />'''4/2/0/6/7/6/7/1''' |
||
| − | Yes |
||
| − | No |
||
| − | </poll> |
||
|- |
|- |
||
| − | |'''[[ |
+ | |'''[[Triplet]]''' |
|'''''Shockwave T''''' |
|'''''Shockwave T''''' |
||
|[[Файл:Builds-1.png|thumb]]5, 5, 0, 7, 7, 7, 0, 2 |
|[[Файл:Builds-1.png|thumb]]5, 5, 0, 7, 7, 7, 0, 2 |
||
| − | |||
|Атакующая сборка, которая основывается на большом количестве урона. |
|Атакующая сборка, которая основывается на большом количестве урона. |
||
| − | |<poll> |
||
| − | Is Shockwave T a good build? |
||
| − | Yes |
||
| − | No |
||
| − | </poll> |
||
|} |
|} |
||
| + | [[File:Sniper-2.png|left|thumb|45x45px]] |
||
| − | ==[[Sniper]] |
+ | ==Ветка [[Sniper]]== |
| − | {| class="wikitable |
+ | {| class="wikitable mw-collapsible mw-collapsed" style="width: 100%" |
|- |
|- |
||
| + | ! Танк |
||
| − | ! Tank |
||
| + | ! Название |
||
| − | ! Build Name |
||
| + | ! width="20%" |Сборка |
||
| − | ! Build |
||
| + | ! Описание |
||
| − | ! Description |
||
| − | ! Vote |
||
|- |
|- |
||
| '''[[Sniper]]''' |
| '''[[Sniper]]''' |
||
| − | | '''''Glass Sniper''''' |
+ | | '''''Glass Sniper(рус. стеклянный снайпер)''''' |
| − | | '''1, 1, 0, 5, 7, 7, 7, 5''' |
+ | |[[File:Sniper1.png]] '''1, 1, 0, 5, 7, 7, 7, 5''' |
| − | | |
||
| − | A simple glass cannon sniper that relies on rapid movement and in-and-out strikes against the enemy. Deals a lot of damage if ignored. However, bullets can be easily penetrated by high penetration/RoF classes and it is not recommended to fire into a bunch of enemy bullets. Instead, flank ''then'' fire for maximum damage. |
||
| − | | <poll> |
||
| − | Is Glass Sniper a good build? |
||
| − | Yes |
||
| − | No |
||
| − | </poll> |
||
|- |
|- |
||
| <u>'''[[Sniper]]'''</u> |
| <u>'''[[Sniper]]'''</u> |
||
| '''''Assault Rifle''''' |
| '''''Assault Rifle''''' |
||
| − | | '''1, 1, 0, 3, 7, 7, 7, 7 ''' |
+ | |[[File:Sniper2.png]] '''1, 1, 0, 3, 7, 7, 7, 7 ''' |
| − | | If you decide to ignore the upgrades after sniper, this is a great choice. Sneaking up on people and then when they try to dodge, fire powerful shot after shot at them like, a real Assault Rifle. Bullet speed is not as much necessary, because your movement speed is maxed. The reload is much better than higher tier snipers. For best effect, Use in [[FFA]]. |
||
| − | | <poll> |
||
| − | Is Assault Rifle a good build? |
||
| − | Yes |
||
| − | No |
||
| − | </poll> |
||
|} |
|} |
||
| + | [[File:Ranger-1.png|left|thumb|35x35px]] |
||
| + | |||
=== [[Ranger]] === |
=== [[Ranger]] === |
||
| − | {| class="wikitable |
+ | {| class="wikitable mw-collapsible mw-collapsed" style="width: 100%" |
|- |
|- |
||
| + | ! Танк |
||
| − | ! Tank |
||
| + | ! Название |
||
| − | ! Build Name |
||
| + | ! width="20%" |Сборка |
||
| − | ! Build |
||
| + | ! Описание |
||
| − | ! Description |
||
| − | ! Vote |
||
|- |
|- |
||
| '''[[Ranger]]''' |
| '''[[Ranger]]''' |
||
| '''''Gotta Snipe 'em all!''''' |
| '''''Gotta Snipe 'em all!''''' |
||
| − | | '''3, 3, 0, 7, 7, 7, 0, 6''' |
+ | | '''[[File:RangerB1.png]]3, 3, 0, 7, 7, 7, 0, 6''' |
| − | | Heavy on most bullet upgrades. Some speed to adjust targeting. Not too much on health points but if you want, you can sacrifice one skill point from HP Regeneration and Max HP to maximize Movement Speed. |
||
| − | | <poll> |
||
| − | Is Gotta Snipe 'em all! a good build? |
||
| − | Yes |
||
| − | No |
||
| − | </poll> |
||
|- |
|- |
||
| '''[[Ranger]]''' |
| '''[[Ranger]]''' |
||
| − | | '''''Guerilla''''' |
+ | | '''''Guerilla (Гарилла)''''' |
| − | | '''1, 1, 0, 5, 7, 7, 5. 7''' |
+ | | '''[[File:Ranger2.png]]1, 1, 0, 5, 7, 7, 5. 7''' |
| − | | WARNING! This is a really skill-reliant build. The default Bullet Speed of the Ranger plus the 5 bullet speed should be enough. Can take on almost every tank. The biggest problems are Boosters. Other tanks are no problem if you follow the strategy.<br />'''Strategy'''<br />Keep out of the FoV of other tanks but DON'T shoot them while they are at the edge of your screen. Why? They will track you down and kill you with ease. You need to figure out the range where you can efficently shoot your opponents. NEVER engage in a fight while your enemy is facing you (except if they are low on health). When you are being chased, try to outplay your opponent (you have enough reload and knockback on your bullets to get those pesky boosters and smashers down to low health). If you are not against a rammer, you need to dodge a lot of bullets. After you have halved your enemy's health bar, try to back off. They'll eventually forget about you. Shoot them at the back after (this is why you won't have problems with Twins/Triplets). The damage is extreme and your movement speed is pretty high, but your health stats are low. Keep this in mind. If you find a solution to bullet build Boosters/Fighters, please edit this build! |
||
| − | | <poll> |
||
| − | Is Guerilla a good build? |
||
| − | Yes |
||
| − | No |
||
| − | </poll> |
||
|- |
|- |
||
| '''[[Ranger]]''' |
| '''[[Ranger]]''' |
||
| '''''Sharpshooter''''' |
| '''''Sharpshooter''''' |
||
| − | | '''1, 4, 0, 7, 7, 7, 1, 6''' |
+ | | '''[[File:Ranger3.png]]1, 4, 0, 7, 7, 7, 1, 6''' |
| − | | A build that use [[Bullets]] to deal massive damage to enemies (if played correctly). Maximum [[Stats|Bullet Speed]] makes it so that you shoot really fast bullets that will be hard to dodge (again, if you played it correctly). This build is really reliable on your aiming skill, since your [[Stats|Reload]] stat is low. Also, [[Stats|Movement Speed]] can be really handy if you want to retreat. Use it wisely when playing with this build. |
||
| − | | <poll> |
||
| − | Is Sharpshooter a good build? |
||
| − | Yes |
||
| − | No |
||
| − | </poll> |
||
|- |
|- |
||
| '''[[Ranger]]''' |
| '''[[Ranger]]''' |
||
| − | | '''''You can't see me but I can see you!''''' |
+ | | '''''You can't see me but I can see you!'''''(рус. Ты не можешь увидеть меня но я могу увидеть тебя!) |
| − | | '''2, 3, 0, 7, 7, 7, 7, 0''' |
+ | | '''[[File:Ranger4.png]]2, 3, 0, 7, 7, 7, 7, 0''' |
| − | | This strategy is good in FFA and Domination but you can't do this strategy in [[2 Teams]] or [[4 Teams]]. This build is optimized for long range attacks, NOT short range. First, go to the edge of the arena and make sure there are no bullet spammers nearby. To attack, the best way to shoot is when the enemy is distracted or not shooting. And if you see a [[Smasher]]/[[Landmine]], don't attack and run if they are moving towards you. |
||
| − | | <poll> |
||
| − | Is You can't see me but I can see you! a good build? |
||
| − | Yes |
||
| − | No |
||
| − | </poll> |
||
|} |
|} |
||
| + | [[File:Stalker-1.png|left|thumb|35x35px]] |
||
=== [[Stalker]] === |
=== [[Stalker]] === |
||
| − | {| class="wikitable |
+ | {| class="wikitable mw-collapsible mw-collapsed" style="width: 100%" |
|- |
|- |
||
| + | ! Танк |
||
| − | ! Tank |
||
| + | ! Название |
||
| − | ! Build Name |
||
| + | ! width="20%" |Сборка |
||
| − | ! Build |
||
| + | ! Описание |
||
| − | ! Description |
||
| − | ! Vote |
||
|- |
|- |
||
| '''[[Stalker]]''' |
| '''[[Stalker]]''' |
||
| '''''Surprise Attack!''''' |
| '''''Surprise Attack!''''' |
||
| '''3, 2, 0, 7, 7, 7, 7, 0''' |
| '''3, 2, 0, 7, 7, 7, 7, 0''' |
||
| − | | This tank becomes invisible after you don't move for a while, so you could surprise tanks that come too close (or, in your case, to the place where you can see them) and destroy them with your Bullet Damage. Also you'll need some [[Stats|Health Regeneration]] because staying in one place will cause tanks to hit you not knowing you're there, and if the tank is focused on body damage, that will hurt. |
||
| − | | <poll> |
||
| − | Is Surprise Attack! a good build? |
||
| − | Yes |
||
| − | No |
||
| − | </poll> |
||
|- |
|- |
||
| '''[[Stalker]]''' |
| '''[[Stalker]]''' |
||
| − | | '''''Ghost''''' |
+ | | '''''Ghost(рус. Призрак)''''' |
| '''7, 7, 7, 0, 5, 0, 0, 7''' |
| '''7, 7, 7, 0, 5, 0, 0, 7''' |
||
| − | | If you wanna play it, grab a snack, because you're literally gonna scare people to their death. To build up to this tank, just build the ramming tank, but in the Sniper branch. It's best to ram into high level tanks to boost up or just stay at the [[Pentagon Nest]] with these [[pentagon]]s and [[crashers]], because they will do absolutely nothing but give you EXP. When fully built up, just stay invisible until someone comes close enough to you, and then BAM! One down. OR if you wanna just spook people, position yourself close enough to them and make yourself visible for a second or two. Watching their reaction is just HILARIOUS. Do that more than 3 times to the same person for them to completely freak out. Also, build up movement speed to escape from strong people who you can't kill. Try it. It's worth it (especially considering the Landmine's invisibility nerf). |
||
| − | | <poll> |
||
| − | Is Ghost a good build? |
||
| − | Yes |
||
| − | No |
||
| − | </poll> |
||
|- |
|- |
||
| '''[[Stalker]]''' |
| '''[[Stalker]]''' |
||
| '''''Sneaky''''' |
| '''''Sneaky''''' |
||
| '''7, 2, 0, 7, 7, 7, 3, 0''' |
| '''7, 2, 0, 7, 7, 7, 3, 0''' |
||
| − | | This is similar to the Surprise Attack build. Stay in one spot until a tank comes. Then shoot them when they get close to you. Or, better yet, camp near the leader and kill him when he gets close. Staying close to the enemy base will get you more kills. |
||
| − | | <poll> |
||
| − | Is Sneaky a good build? |
||
| − | Yes |
||
| − | No |
||
| − | </poll> |
||
|- |
|- |
||
| '''[[Stalker]]''' |
| '''[[Stalker]]''' |
||
| '''''Powerful''''' |
| '''''Powerful''''' |
||
| '''4, 7, 5, 3, 7, 7, 0, 0''' |
| '''4, 7, 5, 3, 7, 7, 0, 0''' |
||
| − | | This tank has very powerful bullets and has a long lasting heath. It also comes with some good body damage to kill some unsuspecting tanks. Remember, you will need to correctly adapt the build to fit your needs. Don't do all of one part at once, spread it out over time and you will eventually get there. |
||
| − | | <poll> |
||
| − | Is Powerful (Stalker) a good build? |
||
| − | Yes |
||
| − | No |
||
| − | </poll> |
||
|} |
|} |
||
| + | [[File:Predator-0-0.png|left|thumb|35x35px]] |
||
=== [[Predator]] === |
=== [[Predator]] === |
||
| − | {| class="wikitable |
+ | {| class="wikitable mw-collapsible mw-collapsed" style="width: 100%" |
|- |
|- |
||
| + | ! Танк |
||
| − | ! Tank |
||
| + | ! Название |
||
| − | ! Build Name |
||
| + | ! width="20%" |Сборка |
||
| − | ! Build |
||
| + | ! Описание |
||
| − | ! Description |
||
| − | ! Vote |
||
|- |
|- |
||
| '''[[Predator]]''' |
| '''[[Predator]]''' |
||
| '''''One hit KO''''' |
| '''''One hit KO''''' |
||
| 0''', 0, 5, 6, 7, 7, 5, 3 ''' |
| 0''', 0, 5, 6, 7, 7, 5, 3 ''' |
||
| − | | Heavy bullet damage will mean death to every tank that gets hit (except for rammers, of course) and enough reload will let you damage them even faster. A little bit of movement speed will get you a long way, as it is enough to pursue, retreat and let you repel those [[Tri-Angle]] rammers. This speed will also allow you to quickly move to the center of your FoV while you're 'focusing' your vision and pursue your target faster. High Body Damage is crucial, as body damage lessen the damage given, meaning: you wont get 1 hit KO yourself, even when enganging the [[Ranger]], [[Destroyer]] upgrades and drone using tanks' still a nuisance though. |
||
| − | | <poll> |
||
| − | Is One Hit KO a good build? |
||
| − | Yes |
||
| − | No |
||
| − | </poll> |
||
|- |
|- |
||
| '''[[Predator]]''' |
| '''[[Predator]]''' |
||
| '''''The Real Sniper''''' |
| '''''The Real Sniper''''' |
||
| '''7, 2, 0, 7, 7, 7, 3, 0''' |
| '''7, 2, 0, 7, 7, 7, 3, 0''' |
||
| − | | The 2 points in health will allow you to survive Sniper attacks. You can trade some regen and reload for movement speed to run from rammers. Your high damage will allow you to kill tanks fast. The bullet speed is needed to have fast kills and long range. |
||
| − | | <poll> |
||
| − | Is The Real Sniper a good build? |
||
| − | Yes |
||
| − | No |
||
| − | </poll> |
||
|- |
|- |
||
| '''[[Predator]]''' |
| '''[[Predator]]''' |
||
| '''''Balanced Bolt-Action Sniper''''' |
| '''''Balanced Bolt-Action Sniper''''' |
||
| '''4, 4, 0, 7, 7, 7, 0, 4 ''' |
| '''4, 4, 0, 7, 7, 7, 0, 4 ''' |
||
| − | | This build recommended for player that loves to play with sniper style. As the name suggest, this tank have no reload upgrade which make it shoot really slow, but deadly. It's a balanced build, Have good amount of health, and move fast. Use it wisely when playing with this build. |
||
| − | |<poll> |
||
| − | Is Balanced Bolt-Action Sniper a good build? |
||
| − | Yes |
||
| − | No |
||
| − | </poll> |
||
|} |
|} |
||
| + | [[File:Streamliner-0.png|left|thumb|35x35px]] |
||
=== [[Streamliner]] === |
=== [[Streamliner]] === |
||
| − | {| class="wikitable |
+ | {| class="wikitable mw-collapsible mw-collapsed" style="width: 100%" |
|- |
|- |
||
| + | ! Танк |
||
| − | ! Tank |
||
| + | ! Название |
||
| − | ! Build Name |
||
| + | ! width="20%" |Сборка |
||
| − | ! Build |
||
| − | ! Description |
||
| − | ! Vote |
||
|- |
|- |
||
| '''[[Streamliner]]''' |
| '''[[Streamliner]]''' |
||
| '''''"GET DUNKED ON"''''' |
| '''''"GET DUNKED ON"''''' |
||
| '''0, 5, 0, 7, 7, 7, 7, 0''' |
| '''0, 5, 0, 7, 7, 7, 7, 0''' |
||
| − | | This build is for obliterating tanks at long range, but it does poorly against bullet spammers. This build is optimal for Domination. |
||
| − | | <poll> |
||
| − | Is Get Dunked On a good build? |
||
| − | Yes |
||
| − | No |
||
| − | </poll> |
||
|- |
|- |
||
| '''[[Streamliner]]''' |
| '''[[Streamliner]]''' |
||
| '''''"A REAL LAGGER"''''' |
| '''''"A REAL LAGGER"''''' |
||
| '''5, 7, 0, 0, 7, 7, 7, 0''' |
| '''5, 7, 0, 0, 7, 7, 7, 0''' |
||
| − | | This build is purely to spam out a truckload of bullets. You will defeat anybody whose computer cannot handle all the lag. Wow, guys... |
||
| − | | <poll> |
||
| − | Is A Real Lagger a good build? |
||
| − | Yes |
||
| − | No |
||
| − | </poll> |
||
|- |
|- |
||
| '''[[Streamliner]]''' |
| '''[[Streamliner]]''' |
||
| − | | '''''Mobile Laser''''' |
+ | | '''''Mobile Laser (рус. Мобильный лазер)''''' |
| '''1, 0, 0, 7, 7, 7, 7, 4''' |
| '''1, 0, 0, 7, 7, 7, 7, 4''' |
||
| − | | A glass build that shoots bullets like a laser (since it shoots extremely fast). It's not so powerful and can be destroyed easily but because of the extreme RoF, it can really overwhelm the enemies when they're distracted and slowly but surely destroy them. [[Necromancer]] might be an easy target for you (if you're careful enough) since your movement speed is little bit better than its [[drones]]' movement speed and also, with your RoF, you'll be able to destroy its drones slowly (since it has really low damage and penetration). Pair with a [[Spread Shot]] for maximum efficiency (Best used on [[Domination]]). |
||
| − | | <poll> |
||
| − | Is Mobile Laser a good build? |
||
| − | Yes |
||
| − | No |
||
| − | </poll> |
||
|- |
|- |
||
| '''[[Streamliner]]''' |
| '''[[Streamliner]]''' |
||
| − | | '''''Xtremely Powerful''''' |
+ | | '''''Xtremely Powerful (рус. Экстремально сильный)''''' |
| '''4, 5, 0, 6, 6, 6, 6, 0''' |
| '''4, 5, 0, 6, 6, 6, 6, 0''' |
||
| − | | This build has pretty good health stats, and has almost maxed out [[bullets]]. Just stay near the middle and wait for enemy tanks to come, and then use your bullets to destroy them, just don't turn [[Auto-Fire]] on or keep firing, or enemies will know where you are and team up on you. if you can team up with a Booster, you will be unstoppable. You can get all the rammers, while the [[Booster]] can get the spammers. Just try not to stay in the same spot, or you can be cornered. |
||
| − | | <poll> |
||
| − | Is Xtremely Powerful a good build? |
||
| − | Yes |
||
| − | No |
||
| − | </poll> |
||
|- |
|- |
||
|[[Streamliner|'''Streamliner''']] |
|[[Streamliner|'''Streamliner''']] |
||
|'''''Avada Kedavra''''' |
|'''''Avada Kedavra''''' |
||
|'''1, 0, 0, 7, 7, 7, 6, 5''' |
|'''1, 0, 0, 7, 7, 7, 6, 5''' |
||
| − | |~UNTESTED, USE WITH CAUTION~ |
||
| − | Well... okay, maybe not as strong as the actual Killing Curse(unless you're up against a noob tank?), but strong enough to make your enemies run for the hills. Come and go with grace with your Movement Speed. For Voldemort and Valour. |
||
| − | |||
| − | ''- by II Finale II'' |
||
| − | | <poll> |
||
| − | Is Avada Kedavra a good build? |
||
| − | Yes |
||
| − | No |
||
| − | </poll> |
||
|} |
|} |
||
| + | [[File:Overlordprofile-0.png|left|thumb|35x35px]] |
||
=== [[Overlord]] === |
=== [[Overlord]] === |
||
| − | {| class="wikitable |
+ | {| class="wikitable mw-collapsible mw-collapsed" style="width: 100%" |
|- |
|- |
||
| + | ! Танк |
||
| − | ! Tank |
||
| + | ! Название |
||
| − | ! Build Name |
||
| + | ! width="20%" |Сборка |
||
| − | ! Build |
||
| + | ! Описание |
||
| − | ! Description |
||
| − | ! Vote |
||
|- |
|- |
||
| '''[[Overlord]]''' |
| '''[[Overlord]]''' |
||
| '''''Obliterator''''' |
| '''''Obliterator''''' |
||
| '''6, 6, 0, 7, 7, 7, 0, 0''' |
| '''6, 6, 0, 7, 7, 7, 0, 0''' |
||
| − | | Here, the build is "Whatever comes in my range I kill." You can trade some HP related points to increase the speed so you can make more offensive plays. |
||
| − | | <poll> |
||
| − | Is Obliterator a good build? |
||
| − | Yes |
||
| − | No |
||
| − | </poll> |
||
|- |
|- |
||
| '''[[Overlord]]''' |
| '''[[Overlord]]''' |
||
| '''''Breakout''''' |
| '''''Breakout''''' |
||
| '''6, 6, 0, 4, 3, 4, 3, 7''' |
| '''6, 6, 0, 4, 3, 4, 3, 7''' |
||
| − | | This build is for people who don't like being flanked by high RoF tanks. You quickly escape with your [[drones]] and since they actually are a bit faster than you, you know your drones won't be left behind unprotected. The best modes for this build are [[2 Teams]], [[4 Teams]], and [[Domination]]. In [[FFA]] you really don't see too many drone carriers due to their fear of being flanked. This tank may be fast but not fast enough for FFA. |
||
| − | | <poll> |
||
| − | Is Breakout a good build? |
||
| − | Yes |
||
| − | No |
||
| − | </poll> |
||
|- |
|- |
||
| '''[[Overlord]]''' |
| '''[[Overlord]]''' |
||
| '''''Survivalist''''' |
| '''''Survivalist''''' |
||
| '''3, 4, 0, 6, 7, 7, 2, 4''' |
| '''3, 4, 0, 6, 7, 7, 2, 4''' |
||
| − | | If you want to survive, then this build is pretty good for both offense and defense. Movement speed, Max health, and Drone Damage confronts Boosters. You can also protect yourself by putting your drones in front of you to shield. When in the Pentagon Nest, turn Auto Fire off and the drones will get whatever is in the way. When 1/3 of your health is remaining, retreat. Stay away from Hybrids and Triplets. |
||
| − | | <poll> |
||
| − | Is Survivalist a good build? |
||
| − | Yes |
||
| − | No |
||
| − | </poll> |
||
|- |
|- |
||
| '''[[Overlord]]''' |
| '''[[Overlord]]''' |
||
| '''''Anti-This''''' |
| '''''Anti-This''''' |
||
| '''0, 0, 0, 7, 7, 7, 7, 5''' |
| '''0, 0, 0, 7, 7, 7, 7, 5''' |
||
| − | | This build is... basically an extremely fast buffed Summoner with basically no HP. Yeah. Normal bullet spammers don't stand a chance, rammers can't run, Snipers will have a hard time hitting you and teamers won't even be able to hurt you a scratch (put drones on the tank then spam right click). This build IS mainly for pros if you want a really high score with it, but the main reason you would want to use this build is to combat other Overlords. You'll be able to out-regenerate their drones and kill them before their drones can reach you. Just watch out for Landmines - even with a fast reaction your drones probably won't be fast enough to prevent you from dying. |
||
| − | | <poll> |
||
| − | Is Anti-This a good build? |
||
| − | Yes |
||
| − | No |
||
| − | </poll> |
||
|- |
|- |
||
| '''[[Overlord]]''' |
| '''[[Overlord]]''' |
||
| '''''Killer Tank''''' |
| '''''Killer Tank''''' |
||
| '''2, 2, 0, 7, 7, 7, 3, 5''' |
| '''2, 2, 0, 7, 7, 7, 3, 5''' |
||
| − | | This build is offensive. It's for people who wants a high kill count. With high Drone Speed you can catch [[Tri-Angle]]s, [[Smasher]]s and all their upgrades with ease. Even if they run out of your field of vision, you are fast enough to catch them, thus in some cases escape from fast tanks. However remember that this build is not a defensive build. |
||
| − | | <poll> |
||
| − | Is Killer Tank a good build? |
||
| − | Yes |
||
| − | No |
||
| − | </poll> |
||
|- |
|- |
||
| '''[[Overlord]]/[[Necromancer]]/[[Manager]]''' |
| '''[[Overlord]]/[[Necromancer]]/[[Manager]]''' |
||
| '''''The Best Defence [DO NOT EDIT THIS TANK WITH FALSE DETAILS D:D:D:]''''' |
| '''''The Best Defence [DO NOT EDIT THIS TANK WITH FALSE DETAILS D:D:D:]''''' |
||
| Overlord: '''6, 2, 0, 7, 7, 7, 4, 0'''<br />Necromancer: '''4, 2, 0, 3, 7, 7, 7, 3'''<br />Manager: '''1, 2, 0, 3, 7, 7, 7, 6'''<br />Adapted: '''2, 2, 0, 4, 7, 7, 7, 4''' |
| Overlord: '''6, 2, 0, 7, 7, 7, 4, 0'''<br />Necromancer: '''4, 2, 0, 3, 7, 7, 7, 3'''<br />Manager: '''1, 2, 0, 3, 7, 7, 7, 6'''<br />Adapted: '''2, 2, 0, 4, 7, 7, 7, 4''' |
||
| − | | These builds will let you live the longest in FFA. Keep moving, and keep your drones close to you. If an overlord approaches, send your drones at the overlord, avoiding its drones. You will ALWAYS kill the overlord before it kills you. If a necromancer approaches, keep the drones inside you then press right-click. Once the drones are roughly around you in a circle, alternate between left-click and right-click to keep them like that. This counts if you're a necromancer, too. The manager is a tricky one. ALWAYS keep your drones as far away as you can keep them from you. If you get spotted, RUN. |
||
| − | | <poll> |
||
| − | Is The Best Defence a good build? |
||
| − | Yes |
||
| − | No |
||
| − | </poll> |
||
|- |
|- |
||
| '''[[Overlord]]''' |
| '''[[Overlord]]''' |
||
| '''''Defensive Overlord''''' |
| '''''Defensive Overlord''''' |
||
| '''2, 6, 1, 7, 7, 7, 1, 2''' |
| '''2, 6, 1, 7, 7, 7, 1, 2''' |
||
| − | | Defensive Overlord build. Good if you want mediocre speed along with having a bulky meta build. As it is not suggested to have 2 points in Health Regen (Thresholds for regen are 1 & 4, 1 is minimum needed, while 4 triples 1's regen speed) you should either invest 2 from health into regen or invest 1 regen point into health. Regen points 2 & 3 are relatively useless, as they only improve 1's regen speed by approx 10-20 percent. |
||
| − | | <poll> |
||
| − | Is Defensive Overlord a good build? |
||
| − | Yes |
||
| − | No |
||
| − | </poll> |
||
|- |
|- |
||
| '''[[Overlord]]''' |
| '''[[Overlord]]''' |
||
| '''Craig's Overlord''' |
| '''Craig's Overlord''' |
||
| '''4, 4, 0, 7, 7, 7, 0, 4''' |
| '''4, 4, 0, 7, 7, 7, 0, 4''' |
||
| − | | This is a strong all-around build. High drone speed, health, and damage provides a strong offense while upgrading health regen and max health supports defense and makes for a harder tank to kill. In [[2 Teams]] and [[4 Teams]], it is a good strategy to avoid bullet spammers, other overlords, and rammers unless you are able to get your drones around them. My favorite move with this overlord is to surprise attack tanks by sending my drones out and then hitting them from behind. This move is risky though as it gives opponents a clean shot at you so it's only recommended if you know your target doesn't have very strong bullet damage. If you can master this overlord, you will be able to consistently reach 100-150k. My personal best is 410k.<br />''-Master Craig'' |
||
| − | | <poll> |
||
| − | Is Craig's Overlord a good build? |
||
| − | Yes |
||
| − | No |
||
| − | </poll> |
||
|- |
|- |
||
| '''[[Overlord]]''' |
| '''[[Overlord]]''' |
||
| '''''Exterminator Drones''''' |
| '''''Exterminator Drones''''' |
||
| '''0,0,0,7,7,7,5,7''' |
| '''0,0,0,7,7,7,5,7''' |
||
| − | | This build is all offense and no defense. The Drones' high health and damage will kill almost every tank instantly. Also, because of the high movement speed, you will be able to kill enemies without them going off your FoV. In addition, the Drones will spawn quickly so you will be able to overwhelm bullet spammers with ease. Works best in FFA, you can get 200k easily. Be careful not to hit any bullets, as they will do a lot of damage to you. |
||
| − | (My best score: 2.8M) |
||
| − | | <poll> |
||
| − | Is Exterminator Drones a good build? |
||
| − | Yes |
||
| − | No |
||
| − | </poll> |
||
|} |
|} |
||
| + | [[File:Managerprofile-0.png|left|thumb|35x35px]] |
||
=== [[Manager]] === |
=== [[Manager]] === |
||
| − | {| class="wikitable |
+ | {| class="wikitable mw-collapsible mw-collapsed" style="width: 100%" |
|- |
|- |
||
| + | ! Танк |
||
| − | ! Tank |
||
| + | ! Название |
||
| − | ! Build Name |
||
| + | ! width="20%" |Сборка |
||
| − | ! Build |
||
| + | ! Описание |
||
| − | ! Description |
||
| − | ! Vote |
||
|- |
|- |
||
| '''[[Manager]]''' |
| '''[[Manager]]''' |
||
| − | | '''''Knight''''' |
+ | | '''''Knight (рус. Рыцарь)''''' |
| '''5, 0, 0, 7, 7, 7, 0, 7''' |
| '''5, 0, 0, 7, 7, 7, 0, 7''' |
||
| − | | With this build you should be able to block most shots with your triangles while cloaked and quickly kill anyone who comes near you. If you do get hit, you can regenerate quickly while running. Your maxed out movement speed also allows you to quickly move while nobody is looking to keep from being spotted. |
||
| − | | <poll> |
||
| − | Is Knight a good build? |
||
| − | Yes |
||
| − | No |
||
| − | </poll> |
||
|- |
|- |
||
| '''[[Manager]]''' |
| '''[[Manager]]''' |
||
| '''''Sneak Attack''''' |
| '''''Sneak Attack''''' |
||
| '''7, 7, 7, 1, 1, 1, 2, 7''' |
| '''7, 7, 7, 1, 1, 1, 2, 7''' |
||
| − | | You can bash into large tanks, dealing damage. The health regeneration and max health will prevent opponents using the same strategy as you from killing you easily. |
||
| − | | <poll> |
||
| − | Is Sneak Attack a good build? |
||
| − | Yes |
||
| − | No |
||
| − | </poll> |
||
|- |
|- |
||
| '''[[Manager]]''' |
| '''[[Manager]]''' |
||
| '''''Double trouble''''' |
| '''''Double trouble''''' |
||
| '''7, 7, 7, 0, 5, 0, 0, 8''' |
| '''7, 7, 7, 0, 5, 0, 0, 8''' |
||
| − | | This build is similar to the Sneak Attack build, but with your [[Stats|Drone Health]], you can either stay invisible, and wait for enemies, or use the Drones to protect yourself while going to fight an enemy. With no damage, you have to be careful that no enemies touch your Drones, or they get suspicious, and realize you're a rammer build. |
||
| − | | <poll> |
||
| − | Is Double Trouble a good build? |
||
| − | Yes |
||
| − | No |
||
| − | </poll> |
||
|} |
|} |
||
| + | [[File:Necromancer-0.png|left|thumb|35x35px]] |
||
=== [[Necromancer]] === |
=== [[Necromancer]] === |
||
| − | {| class="wikitable |
+ | {| class="wikitable mw-collapsible mw-collapsed" style="width: 100%" |
|- |
|- |
||
| + | ! Танк |
||
| − | ! Tank |
||
| + | ! Название |
||
| − | ! Build Name |
||
| + | ! width="20%" |Сборка |
||
| − | ! Build |
||
| + | ! Описание |
||
| − | ! Description |
||
| − | ! Vote |
||
|- |
|- |
||
| '''[[Necromancer]]''' |
| '''[[Necromancer]]''' |
||
| − | | '''''Glass Upgrades''''' |
+ | | '''''Glass Upgrades''''''''(рус. Стеклянные улучшения)''' |
| '''1, 1, 1, 6, 6, 6, 6, 6''' |
| '''1, 1, 1, 6, 6, 6, 6, 6''' |
||
| − | | The one point in body damage is highly recommended to allow you to collect [[square|Squares]] much faster when you have no Squares (smash yourself into a Yellow Square on the map to gain control of it). High health upgrades are not needed due to the fact that you can use the squares to easily kill. |
||
| − | | <poll> |
||
| − | Is Glass Upgrades a good build? |
||
| − | Yes |
||
| − | No |
||
| − | </poll> |
||
|- |
|- |
||
| '''[[Necromancer]]''' |
| '''[[Necromancer]]''' |
||
| '''''REVENGE''''' |
| '''''REVENGE''''' |
||
| '''3, 4, 0, 6, 6, 6, 6, 0, (+2 extra Skill Points)''' |
| '''3, 4, 0, 6, 6, 6, 6, 0, (+2 extra Skill Points)''' |
||
| − | | This build is for people who are seeking revenge on a rammer build. Having no [[Stats|Body damage]] isn't a problem with this because you only have to run into one square then let that get the rest. Your leftover 2 points can be done with anything you want, as you're already pretty prepared. When getting revenge, never do this in a crowded area, as your [[Drones]] can't handle the [[bullets]], so try to do it in the edges of the map, where no one really goes. Then let them have it. |
||
| − | | <poll> |
||
| − | Is Revenge a good build? |
||
| − | Yes |
||
| − | No |
||
| − | </poll> |
||
|- |
|- |
||
| '''[[Necromancer]]''' |
| '''[[Necromancer]]''' |
||
| '''''Anokuu's Build''''' |
| '''''Anokuu's Build''''' |
||
| '''Basic: 0, 0, 0, 7, 7, 7, 6, 6 - Advanced: 0, 0, 0, 6, 7, 7, 7, 6 (Read Guide)''' |
| '''Basic: 0, 0, 0, 7, 7, 7, 6, 6 - Advanced: 0, 0, 0, 6, 7, 7, 7, 6 (Read Guide)''' |
||
| − | | This build is from our almighty god, Anokuu! Just kidding, she doesn't like that XD Anyway, [https://www.reddit.com/r/Diepio/comments/4r3hvo/anokuus_offensive_necromancer_guide/ Here]'s her guide to necromancer. |
||
| − | | <poll> |
||
| − | Is Anokuu's Build a good build? |
||
| − | Yes |
||
| − | No |
||
| − | </poll> |
||
|- |
|- |
||
|'''[[Necromancer]]''' |
|'''[[Necromancer]]''' |
||
|'''''Square Swarm''''' |
|'''''Square Swarm''''' |
||
|'''0, 0, 0, 7, 7, 7, 7, 5''' |
|'''0, 0, 0, 7, 7, 7, 7, 5''' |
||
| − | |Made by OctoTank. Your drones are maxed so they can stop anything, always shield yourself when not attacking and never let your drones get too far from you since you have little health. Look up online Necromancer attacking tactics to see how to attack better. You can replace speed for health regen, if you want. |
||
| − | | |
||
|} |
|} |
||
| + | [[File:Battleship-0.png|left|thumb|35x35px]] |
||
=== [[Battleship]] === |
=== [[Battleship]] === |
||
| − | {| class="wikitable |
+ | {| class="wikitable mw-collapsible mw-collapsed" style="width: 100%" |
|- |
|- |
||
| + | ! Танк |
||
| − | ! Tank |
||
| + | ! Название |
||
| − | ! Build Name |
||
| + | ! width="20%" |Сборка |
||
| − | ! Build |
||
| + | ! Описание |
||
| − | ! Description |
||
| − | ! Vote |
||
|- |
|- |
||
| '''[[Battleship]]''' |
| '''[[Battleship]]''' |
||
| − | | '''''Quality Over Quantity''''' |
+ | | '''''Quality Over Quantity''''''''(рус. Качество вместо количества)''' |
| '''0, 5, 0, 6, 7, 7, 3, 5''' |
| '''0, 5, 0, 6, 7, 7, 3, 5''' |
||
| − | | Don't let the name fool you, the [[Stats|reload]] on this build is nice: similar to the [[Gunner]]'s. The penetration and damage on this build are low, so you want to max those out. Movement speed for running from bosses and flankers, although you could put a point or two from this from this and put it into health regeneration. I've got 165k in [[FFA]], before getting weakened and eventually killed by another Battleship. Haven't been tested in other [[game modes]] though. |
||
| − | | <poll> |
||
| − | Is Quality Over Quantity a good build? |
||
| − | Yes |
||
| − | No |
||
| − | </poll> |
||
|- |
|- |
||
| '''[[Battleship]]''' |
| '''[[Battleship]]''' |
||
| − | | '''''Gamebreaker''''' |
+ | | '''''Gamebreaker''''''''(рус. Уничтожатель игр)''' |
| '''2, 2, 0, 7, 7, 7, 7, 1''' |
| '''2, 2, 0, 7, 7, 7, 7, 1''' |
||
| − | | This build has maxed out [[stats|Drone Everything]] which makes it have crowds of drones that are faster than a [[Booster]]. The tank is a very weak glass tank, however, and only has a little health. Use your controllable [[Drones]] to shield the tank from bullets. The one point in Movement Speed is to dodge Destroyer bullets. You could have 3 Max Health but only 1 Regeneration or 4 Max Health and no passive regeneration. |
||
| − | | <poll> |
||
| − | Is Gamebreaker a good build? |
||
| − | Yes |
||
| − | No |
||
| − | </poll> |
||
|} |
|} |
||
| + | [[File:Tri-trapper-0.png|left|thumb|35x35px]] |
||
=== [[Tri-Trapper]] === |
=== [[Tri-Trapper]] === |
||
| − | {| class="wikitable |
+ | {| class="wikitable mw-collapsible mw-collapsed" style="width: 100%" |
|- |
|- |
||
| + | ! Танк |
||
| − | ! Tank |
||
| + | ! Название |
||
| − | ! Build Name |
||
| + | ! width="20%" |Сборка |
||
| − | ! Build |
||
| + | ! Описание |
||
| − | ! Description |
||
| − | ! Vote |
||
|- |
|- |
||
| '''[[Tri-Trapper]]''' |
| '''[[Tri-Trapper]]''' |
||
| − | | '''''Ultimate Defense''''' |
+ | | '''''Ultimate Defense (Ультимативная защита)''''' |
| '''5, 7, 0, 0, 7, 7, 7, 0''' |
| '''5, 7, 0, 0, 7, 7, 7, 0''' |
||
| − | | This build uses Traps to protect you and your teammates. With Maximum [[Stats|Bullet Penetration]] and [[Stats|Reload]], it will protect you from most projectiles. Also with Maximum [[Stats|Bullet Damage]] it will protect you from rammer tanks since the projectiles deal a lot of damage. This uses no bullet speed in order to keep the traps tightly packed. It's great on [[2 Teams]] as you can use it to provide a safe zone for your teammates, especially if you are right next to the enemies' side. If you press C and E your tank will automatically spin and fire to spew out traps in all directions (standing still for a while will create a thick circle of traps around you). |
||
| − | | <poll> |
||
| − | Is Ultimate Defense a good build? |
||
| − | Yes |
||
| − | No |
||
| − | </poll> |
||
|} |
|} |
||
| + | [[File:Gunner Trapper-0.png|left|thumb|35x35px]] |
||
=== [[Gunner Trapper]] === |
=== [[Gunner Trapper]] === |
||
| − | {| class="wikitable |
+ | {| class="wikitable mw-collapsible mw-collapsed" style="width: 100%" |
|- |
|- |
||
| + | ! Танк |
||
| − | ! Tank |
||
| + | ! Название |
||
| − | ! Build Name |
||
| + | ! width="20%" |Сборка |
||
| − | ! Build |
||
| + | ! Описание |
||
| − | ! Description |
||
| − | ! Vote |
||
|- |
|- |
||
| '''[[Gunner Trapper]]''' |
| '''[[Gunner Trapper]]''' |
||
| '''''Powerful''''' |
| '''''Powerful''''' |
||
| '''7, 2, 0, 7, 7, 7, 0, 3''' |
| '''7, 2, 0, 7, 7, 7, 0, 3''' |
||
| − | | This Tank is quite powerful. The Traps of this tank should be used as a shield to enclose yourself and use your bullets as your main weapon. Very good for [[2 Teams]] and [[4 Teams]]. Just don't try to take on an [[Octo Tank]], [[Necromancer]] or a [[Destroyer]] with it. [[Overlord]]'s drones can be countered with your trap-shield and your bullets will give you an edge over that. [[Stalker]]s and [[Manager]]s can surprise you but your Traps will usually trap them, even in their invisible forms. Don't try to take too many pentagons or your team will lose. Pair with a Predator for maximum efficiency. |
||
| − | | <poll> |
||
| − | Is Powerful a good build? |
||
| − | Yes |
||
| − | No |
||
| − | </poll> |
||
|- |
|- |
||
| [[Gunner Trapper|'''Gunner Trapper''']] |
| [[Gunner Trapper|'''Gunner Trapper''']] |
||
| '''''Fighter''''' |
| '''''Fighter''''' |
||
| '''''1, 0, 0, 7, 7, 7, 7, 3''''' |
| '''''1, 0, 0, 7, 7, 7, 7, 3''''' |
||
| − | | An offensive build type. Used to have really high reload and maximum bullet stats, but low on defense such as [[Health]] . [[Speed]] upgrade will help tank to move faster, so it can dodge more bullet. This bullet's class used to be a gunner bullet, but unlike [[Gunner]], it's deal major damage when hit enemy and the traps can help you in a sticky situation. |
||
| − | |<poll> |
||
| − | Is Fighter a good build? |
||
| − | Yes |
||
| − | No |
||
| − | </poll> |
||
|} |
|} |
||
| + | [[File:Mega trapper-1.png|left|thumb|35x35px]] |
||
=== [[Mega Trapper]] === |
=== [[Mega Trapper]] === |
||
| − | {| class="wikitable |
+ | {| class="wikitable mw-collapsible mw-collapsed" style="width: 100%" |
|- |
|- |
||
| + | ! Танк |
||
| − | ! Tank |
||
| + | ! Название |
||
| − | ! Build Name |
||
| + | ! width="20%" |Сборка |
||
| − | ! Build |
||
| + | ! Описание |
||
| − | ! Description |
||
| − | ! Vote |
||
|- |
|- |
||
| '''[[Mega Trapper]]''' |
| '''[[Mega Trapper]]''' |
||
| '''''Great Wall of China''''' |
| '''''Great Wall of China''''' |
||
| '''4, 1, 0, 7, 7, 7, 7, 0''' |
| '''4, 1, 0, 7, 7, 7, 7, 0''' |
||
| − | | This build should be used mainly in [[2 Teams]], in groups. This tank should be used with other Mega Trappers, as one alone, while powerful and with a ton of damage, simply doesn't have the [[Stats|Reload]] to defend itself alone, as a group of five or more tanks could easily kill a Mega Trapper. Maximum Reload, Bullet Penetration and Bullet Speed allow you to defend as easily and efficiently as possible, while Bullet Damage is for easily killing anyone stupid enough to blunder into your traps. Pair up with four or more Mega Trappers (including yourself), and an [[Octo Tank]] or two, and you could easily take over the [[Pentagon Nest|middle]] and keep it safe so your teammates can get in and start farming as long as they want. Keep in mind, however, this tank is purely a support tank, so this would be a bad choice to use for farming or PvP.<br />- Note: Be cautious of flanking shots / Drones that may attempt to kill your tank. It may be easier to stay as a regular tank and upgrade along the path listed above, as Sniper and Trapper classes are generally pretty bad at gaining EXP, and once the tank is level 45, immediately switch to Mega Trapper. This class is not meant to rush into battle, but rather slowly build up strong defensive walls and intimidate enemies due to the large amount of traps placed. |
||
| − | | <poll> |
||
| − | Is Great Wall of China a good build? |
||
| − | Yes |
||
| − | No |
||
| − | </poll> |
||
|} |
|} |
||
| + | [[File:Auto Trapper-0.png|left|thumb|35x35px]] |
||
=== [[Auto Trapper]] === |
=== [[Auto Trapper]] === |
||
| − | {| class="wikitable |
+ | {| class="wikitable mw-collapsible mw-collapsed" style="width: 100%" |
|- |
|- |
||
| + | ! Танк |
||
| − | ! Tank |
||
| + | ! Название |
||
| − | ! Build Name |
||
| + | ! width="20%" |Сборка |
||
| − | ! Build |
||
| + | ! Описание |
||
| − | ! Description |
||
| − | ! Vote |
||
|- |
|- |
||
| '''[[Auto Trapper]]''' |
| '''[[Auto Trapper]]''' |
||
| Строка 760: | Строка 447: | ||
'''0, 0, 0, 6, 7, 7, 7, 6 (More Attack)''' |
'''0, 0, 0, 6, 7, 7, 7, 6 (More Attack)''' |
||
| − | | A build similar to the Tri-Trapper Build (Ultimate Defense), but this time it's not just defense, since this class has an Auto Turret. It can shoot at your enemy while you build a wall of Traps for your teammates. This build can be focused neither defense or attack. "Defense" build will be useful on [[2 Teams]], [[4 Teams]] and [[Domination]]. "Attack" build will be useful at [[Maze]] |
||
| − | | <poll> |
||
| − | Is Wall Turret a good build? |
||
| − | Yes |
||
| − | No |
||
| − | </poll> |
||
|} |
|} |
||
| + | [[File:Overtrapper-0.png|left|thumb|35x35px]] |
||
=== [[Overtrapper]] === |
=== [[Overtrapper]] === |
||
| + | {| class="wikitable mw-collapsible mw-collapsed" style="width: 100%" |
||
| − | {| class="article-table" |
||
| + | |- |
||
| − | |'''Tank''' |
||
| + | ! Танк |
||
| − | |Build |
||
| + | ! Название |
||
| − | | |
||
| + | ! width="20%" |Сборка |
||
| − | |Description |
||
| + | ! Описание |
||
| − | |Vote |
||
|- |
|- |
||
|[[Overtrapper|'''Overtrapper''']] |
|[[Overtrapper|'''Overtrapper''']] |
||
| + | |'''<nowiki/>'standart'defense ('Стандартная'Защита)'''<nowiki/>''<nowiki/>'' |
||
| − | |'''Standart''''''Defence''' |
||
|'''0, 4, 0, 6, 6, 6, 7, 4.''' |
|'''0, 4, 0, 6, 6, 6, 7, 4.''' |
||
| − | |After a lot of experimenting in [[FFA]], this is a good build for overtrapper. |
||
| − | Just build a traps wall (wall, no circle,) and wait, then when a enemy aproaches the drones attack and traps help. |
||
| − | | |
||
| − | <nowiki><poll> |
||
| − | Is 'Standart' Defence a good build? |
||
| − | Yes |
||
| − | No |
||
| − | </poll></nowiki> |
||
|} |
|} |
||
| + | [[File:Machinegun-0.png|left|thumb|35x35px]] |
||
| − | ==[[Machine Gun]] |
+ | ==Ветка [[Machine Gun]]== |
| − | {| class="wikitable |
+ | {| class="wikitable mw-collapsible mw-collapsed" style="width: 100%" |
|- |
|- |
||
| + | ! Танк |
||
| − | ! Tank |
||
| + | ! Название |
||
| − | ! Build Name |
||
| + | ! width="20%" |Сборка |
||
| − | ! Build |
||
| + | ! Описание |
||
| − | ! Description |
||
| − | ! Vote |
||
|- |
|- |
||
| '''[[Machine Gun]]''' |
| '''[[Machine Gun]]''' |
||
| − | | '''''Gold Nugget''''' |
+ | | '''''Gold Nugget (рус. Кусочек золота)''''' |
| '''7, 7, 0, 0, 6, 6, 7, 0''' |
| '''7, 7, 0, 0, 6, 6, 7, 0''' |
||
| − | | This build is unstoppable but weak. Don't attack tanks with it. Instead, watch tanks try to attack you and fail miserably. Just watch out for teamers and overlords. |
||
| − | | <poll> |
||
| − | Is Gold Nugget a good build? |
||
| − | Yes |
||
| − | No |
||
| − | </poll> |
||
|} |
|} |
||
| + | [[File:Destroyer-0.png|left|thumb|35x35px]] |
||
| − | === [[Destroyer]] === |
+ | === [[Destroyer]] (не предельный ярус) === |
| − | {| class="wikitable |
+ | {| class="wikitable mw-collapsible mw-collapsed" style="width: 100%" |
|- |
|- |
||
| + | ! Танк |
||
| − | ! Tank |
||
| + | ! Название |
||
| − | ! Build Name |
||
| + | ! width="20%" |Сборка |
||
| − | ! Build |
||
| + | ! Описание |
||
| − | ! Description |
||
| − | ! Vote |
||
|- |
|- |
||
| '''[[Destroyer]]''' / '''[[Annihilator]]''' / '''[[Hybrid]]''' |
| '''[[Destroyer]]''' / '''[[Annihilator]]''' / '''[[Hybrid]]''' |
||
| '''''Jelly Fish''''' |
| '''''Jelly Fish''''' |
||
| '''7, 7, 7, 0, 0, 0, 5, 7''' |
| '''7, 7, 7, 0, 0, 0, 5, 7''' |
||
| − | | Rare build utilizing [[Stats|body damage]] as the main coefficient. The 5 levels in reload should be considered last, however it is useful to allow you to shoot with the Destroyer more often, essentially letting you boost more often. The seven points in Movement Speed lets you ram players more easily. |
||
| − | | <poll> |
||
| − | Is Jelly Fish a good build? |
||
| − | Yes |
||
| − | No |
||
| − | </poll> |
||
|- |
|- |
||
| '''[[Destroyer]]''' |
| '''[[Destroyer]]''' |
||
| '''''Wrecking Ball''''' |
| '''''Wrecking Ball''''' |
||
| '''2, 3, 0, 4, 7, 7, 7, 3''' |
| '''2, 3, 0, 4, 7, 7, 7, 3''' |
||
| − | | Your high penetration will absolutely destroy and fast firing tanks such as the Sprayer, Twins and Triplet's bullets but be on your guard for Overlords, their fast reload drones means that your large bullet will quickly be overwhelmed by the drones. In this case, fire back while moving away, as your recoil will push you back and your speed will help you move and get to the Pentagon Nest, so you can get protected by Pink triangles which you can destroy if everything goes south. |
||
| − | | <poll> |
||
| − | Is Wrecking Ball a good build? |
||
| − | Yes |
||
| − | No |
||
| − | </poll> |
||
|- |
|- |
||
| '''[[Destroyer]]''' |
| '''[[Destroyer]]''' |
||
| '''Weird build!''' |
| '''Weird build!''' |
||
| '''7, 7, 7, 7, 5, 0, 0, 0''' |
| '''7, 7, 7, 7, 5, 0, 0, 0''' |
||
| − | | This class is only for highly skilled players and should not be used on a standard basis. While using this class, ram into a Smasher (NOT LANDMINE) ONCE!<br />'''Overall :''' This class using a body damage build, but with low movement speed and tough, medium speed bullets. |
||
| − | | <poll> |
||
| − | Is Weird build! a good build? |
||
| − | Yes |
||
| − | No |
||
| − | Its A Weird Build! |
||
| − | </poll> |
||
|- |
|- |
||
| '''[[Destroyer]]''' |
| '''[[Destroyer]]''' |
||
| '''''Beefy, Speedy, and "Deadly"''''' |
| '''''Beefy, Speedy, and "Deadly"''''' |
||
| '''''7, 7, 7, 0, 0, 5, 0, 7''''' |
| '''''7, 7, 7, 0, 0, 5, 0, 7''''' |
||
| − | | This build is similar to the "Jellyfish" Destroyer Build, but putting the 5 extra in Bullet Damage, instead of Reload. The Health Regen, Max Health, and Body Damage make your tank a real Tank, the Movement Speed, along with the large recoil form the main turret, moves you to your destination, and the Bullet Damage is there because when the going gets rough, a fast, tanky Hybrid had better be able to prove it's worth. By: TFM101 |
||
| − | | <poll> |
||
| − | Is Beefy, Speedy, and "Deadly" a good build? |
||
| − | Yes |
||
| − | No |
||
| − | </poll> |
||
|} |
|} |
||
| + | [[File:HybridProfile-0.png|left|thumb|35x35px]] |
||
=== [[Hybrid]] === |
=== [[Hybrid]] === |
||
| − | {| class="wikitable |
+ | {| class="wikitable mw-collapsible mw-collapsed" style="width: 100%" |
|- |
|- |
||
| + | ! Танк |
||
| − | ! Tank |
||
| + | ! Название |
||
| − | ! Build Name |
||
| + | ! width="20%" |Сборка |
||
| − | ! Build |
||
| + | ! Описание |
||
| − | ! Description |
||
| − | ! Vote |
||
|- |
|- |
||
| '''[[Hybrid]]''' |
| '''[[Hybrid]]''' |
||
| '''Rammer''' |
| '''Rammer''' |
||
| '''''6,6,6,0,2,0,6,6''''' |
| '''''6,6,6,0,2,0,6,6''''' |
||
| − | | With almost [[Stats|max health]] and [[Stats|body damage]], you should take out most other non-rammer tanks. Especially good with [[overseer]] classes. Adding two points in [[Stats|penetration]] add a little punch to the bullet but it is not the main attack wepon. |
||
| − | | <poll> |
||
| − | Is Rammer a good build? |
||
| − | Yes |
||
| − | No |
||
| − | </poll> |
||
|- |
|- |
||
| '''[[Hybrid]]''' |
| '''[[Hybrid]]''' |
||
| '''Skill Spreader''' |
| '''Skill Spreader''' |
||
| '''''5,4,4,4,4,4,4,4''''' |
| '''''5,4,4,4,4,4,4,4''''' |
||
| − | | The point is, depending on what the opponent is using, use the other thing. You should win. |
||
| − | | <poll> |
||
| − | Is Skill Spreader a good build? |
||
| − | Yes |
||
| − | No |
||
| − | </poll> |
||
|- |
|- |
||
| '''[[Hybrid]]''' |
| '''[[Hybrid]]''' |
||
| '''''Deceptive Destruction''''' |
| '''''Deceptive Destruction''''' |
||
| '''''3, 7, 7, 1, 0, 4, 4, 7''''' |
| '''''3, 7, 7, 1, 0, 4, 4, 7''''' |
||
| − | | The two drones will attempt to protect you, but your main skill is your [[Stats|body damage]]. People naturally expect the Hybrid to focus on bullet upgrades, as that is the point of both the Destroyer and Overseer, but your body damage and [[Stats|Maximum Health]] mean they are in for a surprise. Also, with the boost to health and bullet damage granted by the Destroyer upgrade, you can still do long distance damage. |
||
| − | | <poll> |
||
| − | Is Deceptive Destruction a good build? |
||
| − | Yes |
||
| − | No |
||
| − | </poll> |
||
|- |
|- |
||
| '''[[Hybrid]]''' |
| '''[[Hybrid]]''' |
||
| '''''Middle Roman Conqueror''''' |
| '''''Middle Roman Conqueror''''' |
||
| '''3, 5, 1, 6, 7, 7, 2, 2''' |
| '''3, 5, 1, 6, 7, 7, 2, 2''' |
||
| − | | This tank build is focused on surviving and taking out big targets (usually on the leaderboard) with a strict, but simple strategy. The 1 [[Stats|Body Damage]] is extremely helpful for running away from high (risk) threat enemies and having a good stand in the middle area. The main objective in this build is to takeover the middle of the map and stay there. [Crashers] are definitely going to target you, so Body Damage is extremely helpful especially since this build doesn't have the mightiest of [[Stats|maximum health]] with it. With this build nothing will be that big of a threat, although take extreme caution around [[Overlord]]s, (Whether it's Ramming or not) [[Booster]]s (which usually won't follow or challenge you so confidently because of your class), and other Hybrids, especially. The 2 points in Movement Speed is helpful for running away or taking steps back trying to hit your opponent (this will be very helpful for facing Overlords and/or Boosters) so you can survive.<br />'''Strategy'''<br />The best strategy for this build is going to be staying put in the middle. Once you take out most of the higher dangerous tanks on the leaderboard, you're practically safe, but when you feel like you're not safe and/or have a low amount of health, back up from the middle and patrol/orbit around it until you either feel safe again or have enough health to strike back without much worry, but do not go far from it. This build isn't for taking on a lot of tanks at once, it's for taking out your targets (#1 on the leaderboard, your rival, etc.) one by one. Another way to do it is to attack while your target is fighting with someone else. Your hits will come to them by surprise and after battling someone they are probably aren't high on health at the moment, so striking then/now is key. |
||
| − | | <poll> |
||
| − | Is Middle Roman Conqueror a good build? |
||
| − | Yes |
||
| − | No |
||
| − | SPARTAAAAAAAAAAAAA!!!!!!! |
||
| − | </poll> |
||
|- |
|- |
||
| '''[[Hybrid]]''' |
| '''[[Hybrid]]''' |
||
| '''''Wrecker''''' |
| '''''Wrecker''''' |
||
| '''''7, 7, 0, 0, 5, 7, 7, 0''''' |
| '''''7, 7, 0, 0, 5, 7, 7, 0''''' |
||
| − | | This build is useful for [[Domination]] mode, as your bullets are very similar to a [[Dominator]]'s. This is a very slow build, but it is very durable. Do not try to pursue targets, but rather, destroy anyone who comes too close to one of your team's controlled turrets. This build can also be used to capture a contested turret, given your very [[Stats|high penetration and damage stats]]. Upgrading to Hybrid is very useful with this build as your [[Drones]] can take a lot of hits, protecting you from stray bullets. Upgrade your bullet stats first, then your health. |
||
| − | | <poll> |
||
| − | Is Wrecker a good build? |
||
| − | Yes |
||
| − | No |
||
| − | </poll> |
||
|- |
|- |
||
| '''[[Hybrid]]''' |
| '''[[Hybrid]]''' |
||
| '''''The Real HYbrid''''' |
| '''''The Real HYbrid''''' |
||
| '''''0, 5, 5, 4, 6, 6, 7, 0''''' |
| '''''0, 5, 5, 4, 6, 6, 7, 0''''' |
||
| − | | This build not only makes you a shooting threat but you can go in and ram into low-medium health tanks to finish them off. Just stay as Machine Gun until Level 45 because after you have everything upgraded this build is only good then. It's actually really good in [[FFA]], [[2 Teams]], and [[4 Teams]]. But you can sacrifice bullet damage and penetration for max [[Stats|health and body damage]]. |
||
| − | | <poll> |
||
| − | Is The Real HYbrid a good build? |
||
| − | Yes |
||
| − | No |
||
| − | </poll> |
||
|- |
|- |
||
| '''[[Hybrid]]''' |
| '''[[Hybrid]]''' |
||
| '''''"Man o' War"''''' |
| '''''"Man o' War"''''' |
||
| '''''1, 4, 2, 7, 6, 7, 6, 0''''' |
| '''''1, 4, 2, 7, 6, 7, 6, 0''''' |
||
| − | | Named after the deadly jellyfish, this build takes melee combat to a whole new level. The added endurance of having 3 levels in both [[Stats|Body Damage and Maximum Health]] will allow you to take 5 more hits than normal tanks would, allowing you to go up to any bullet spamming class and fire loads of bullets at them causing them to struggle between firing directly at your bullets and at your Drones. This build can be used for fighting teams in FFA since your high reload and undying rage will be hard to dodge. Take 0, 4, 3, 7, 6, 7, 6, 0 if you're only out to get revenge on some one. That build won't do you as well as the '''Man 'o War''' would if you're aiming to be number 1 for a really long time.<br />'''Strategy'''<br />Like any jellyfish you will be always moving and roaming around the "ocean" normally killing things unfortunate enough to come across your "sting" screen. It is preferable that you fight in the middle since there are less polygons so you can utilize your drones well. Always be on the move by using your bullets to propel you towards the direction you want to go (so that Snipers will have a harder time aiming at you - a good Sniper, however, knows some tricks to counter this). When fighting be sure you move yourself as close to the enemy as possible so that the Drones will sting the target who is struggling really hard to dodge your barrage of bullets. Don't attract any attention when your health is low and just keep moving or stay still (if there are no Snipers). |
||
| − | | <poll> |
||
| − | Is Man o' War a good build? |
||
| − | Yes |
||
| − | No |
||
| − | </poll> |
||
|- |
|- |
||
| '''[[Hybrid]]''' |
| '''[[Hybrid]]''' |
||
| '''''"Bullet Rammy"''''' |
| '''''"Bullet Rammy"''''' |
||
| '''''5, 0, 7, 7, 0, 0, 7, 7''''' |
| '''''5, 0, 7, 7, 0, 0, 7, 7''''' |
||
| − | | The main problem is setting up as the Machine Gun bullets are really weak so you can only really use Body Damage. This build is a build capable of taking care of any enemy. The Hybrid's base Max HP (plus the Drones) should be enough to let you survive a while, while the Bullet Damage and Penetration are also built in. Movement Speed couples with Bullet Speed, Reload and Body Damage for an effective Shoot/Ram adapting strategy. The rules are simple: |
||
| − | |||
| − | |||
| − | *If the enemy has a Bullet Build, ram them with your recoil. |
||
| − | *If the enemy has a Body Build, shoot them with your powerful bullets. |
||
| − | *If you can't win the fight, use your recoil to retreat. |
||
| − | | <poll> |
||
| − | Is Bullet Rammy a good build? |
||
| − | Yes |
||
| − | No |
||
| − | </poll> |
||
|- |
|- |
||
| '''[[Hybrid]]''' |
| '''[[Hybrid]]''' |
||
| '''''"AntiRed"''''' |
| '''''"AntiRed"''''' |
||
| '''''0, 0, 0, 7, 7, 7, 7, 5''''' |
| '''''0, 0, 0, 7, 7, 7, 7, 5''''' |
||
| − | | (This would be called AntiTank if you were in a team mode.) This build is EXTREMELY powerful, but ONLY if you have good teammates. If you do, you will get GUARANTEED at least 100k score. Use this build with caution, as one shot from a Sniper and you're dead. You MUST be able to know how to counter all bullets coming your way. This build also works a LOT better if you have a bullet spammer and a Tri-Trapper or Mega Trapper defending you. If you want to dominate FFA, then use The Real HYbrid instead. |
||
| − | | <poll> |
||
| − | Is AntiRed a good build? |
||
| − | Yes |
||
| − | No |
||
| − | </poll> |
||
|- |
|- |
||
| '''[[Hybrid]]''' |
| '''[[Hybrid]]''' |
||
| '''''"Increased Bullet Supply"''''' |
| '''''"Increased Bullet Supply"''''' |
||
| '''''4, 4, 0, 7, 5, 6, 7, 0''''' (You may trade some HP upgrades for speed) |
| '''''4, 4, 0, 7, 5, 6, 7, 0''''' (You may trade some HP upgrades for speed) |
||
| − | | Be cautious in attempting to attack bullet spammers. You don't have that much health, especially if you traded points for speed. This build works best in Tag Mode and Domination. If used correctly, you may get double-kills. |
||
| − | | <poll> |
||
| − | Is Increased Bullet Supply a good build? |
||
| − | Yes |
||
| − | No |
||
| − | Sandvich |
||
| − | </poll> |
||
|- |
|- |
||
| '''[[Hybrid]]''' |
| '''[[Hybrid]]''' |
||
| '''Confusing the Boosters''' |
| '''Confusing the Boosters''' |
||
| '''''0, 7, 7, 0, 6, 6, 0, 7''''' |
| '''''0, 7, 7, 0, 6, 6, 0, 7''''' |
||
| − | | This build works amazing with Booster builds. You can really have fun messing with them, you can take out really any tank though. You have strong bullets, and can ram too, just focus on keeping the ramming a secret, or you give away the fun part. If anyone gets too close, hit them with a bullet, if that doesn't finish them off, the ram will. |
||
| − | | <poll> |
||
| − | Is Confusing the Boosters a good build? |
||
| − | Yes |
||
| − | No |
||
| − | </poll> |
||
|- |
|- |
||
| '''[[Hybrid]]''' |
| '''[[Hybrid]]''' |
||
| '''Lagbreaker's build''' |
| '''Lagbreaker's build''' |
||
| '''''3, 0, 0, 7, 6, 6, 4, 7''''' |
| '''''3, 0, 0, 7, 6, 6, 4, 7''''' |
||
| − | | This build is just so goddamn good. This build is mainly for people with a bit more experience than most. This is due to the high movement speed and low health, which is only helpful IF the player is proficient at dodging bullets and strafing. The reload is low because the points are more important in other places. If you're using this build, you should be good enough to aim your bullets and know when to fire well enough to be perfectly safe and extremely threatening to everyone in your quadrant of the server.<br />Link to Lagbreaker's 3 mil vid: https://www.youtube.com/watch?v=WnDOQWecvO4 |
||
| − | | <poll> |
||
| − | Is Lagbreaker's build a good build? |
||
| − | Yes |
||
| − | No |
||
| − | </poll> |
||
|} |
|} |
||
| + | [[File:Annihilator-0.png|left|thumb|35x35px]] |
||
=== [[Annihilator]] === |
=== [[Annihilator]] === |
||
| − | {| class="wikitable |
+ | {| class="wikitable mw-collapsible mw-collapsed" style="width: 100%" |
|- |
|- |
||
| + | ! Танк |
||
| − | ! Tank |
||
| + | ! Название |
||
| − | ! Build Name |
||
| + | ! width="20%" |Сборка |
||
| − | ! Build |
||
| + | ! Описание |
||
| − | ! Description |
||
| − | ! Vote |
||
|- |
|- |
||
| '''[[Annihilator]]''' |
| '''[[Annihilator]]''' |
||
| '''Rammer''' |
| '''Rammer''' |
||
| '''''5, 7, 7, 0, 0, 0, 7, 7''''' |
| '''''5, 7, 7, 0, 0, 0, 7, 7''''' |
||
| − | | Annihilator seems to be slightly faster than the Destroyer (sandbox testing, could be wrong). But their speeds are extremely close nevertheless, so this is just a Destroyer rammer build. |
||
| − | | <poll> |
||
| − | Is Rammer a good build? |
||
| − | Yes |
||
| − | No |
||
| − | </poll> |
||
|- |
|- |
||
| '''[[Annihilator]]''' |
| '''[[Annihilator]]''' |
||
| '''The Magic Shot''' |
| '''The Magic Shot''' |
||
| '''4, 4, 0, 7, 7, 7, 4, 0''' |
| '''4, 4, 0, 7, 7, 7, 4, 0''' |
||
| − | | This tank has the largest bullets in the game (Besides [[Arena Closers]]). Note that an [[Annihilator]]'s bullets do the same amount of damage as a [[Destroyer]] or [[Hybrid]], so it should generally stay away from them if they have a faster reload than you. You can out-penetrate anyone, they won't be able to do anything back. This build works best against Tier 3 spammers, such as the [[Twin Flank]] and [[Quad Tank]]. If anyone comes near, just chase them with the cannon's recoil and shoot at them when close enough. This build will get one guaranteed on the [[scoreboard]], and also first. Remember to stay away from other tanks in the [[Destroyer]] branch, the [[Smasher]] branch (as they mainly focuses on its body [[stats]] and can survive many shots to ram the [[Annihilator]] to death, although it is still possible to defeat them by sniping from a distance) and the [[Overseer]] branch (excluding the [[Overtrapper]]. [[Overlord]]s can sacrifice only a few [[drones]] to destroy one [[Annihilator]] bullet, meaning the slow reload will allow the remaining drones catch up and attack. [[Necromancer]]s simply have enough drones to easily use the claw on you and kill you as you can't attack both sides due to your slow reload. [[Manager]]s are the same deal as [[Overlord]]s except they usually move slower, drones do less damage and may have higher reload. Their [[invisibility]] could be useful, however, if they are using a troll (rammer) build. |
||
| − | | <poll> |
||
| − | Is The Magic Shot a good build? |
||
| − | Yes |
||
| − | No |
||
| − | Too much magic 11/10 IGN |
||
| − | </poll> |
||
|- |
|- |
||
| '''[[Annihilator]]''' |
| '''[[Annihilator]]''' |
||
| '''Silent Murderer''' |
| '''Silent Murderer''' |
||
| '''1, 5, 0. 7, 7, 7, 6, 0''' |
| '''1, 5, 0. 7, 7, 7, 6, 0''' |
||
| − | | Used for sneaking up on enemies without them noticing and delivering the fatal shot. It's the best if there are enemies attacking close to your base in [[2 Teams]] and [[4 Teams]] to sneak up behind them and give them a fair warning not to get close next time. You can also turn the tables in 1v1 battles by interrupting. Use your recoil to move. Good for all modes of gameplay except [[Tag Mode|Tag Mode.]] |
||
| − | | <poll> |
||
| − | Is Silent Murderer a good build? |
||
| − | Yes |
||
| − | No |
||
| − | There Is A Spy In Our Midst! |
||
| − | </poll> |
||
|- |
|- |
||
|'''[[Annihilator]]''' |
|'''[[Annihilator]]''' |
||
|'''''Blitz3r''''' |
|'''''Blitz3r''''' |
||
|'''6, 6, 0, 7, 7, 7, 0, 0''' |
|'''6, 6, 0, 7, 7, 7, 0, 0''' |
||
| − | |One hit kill on most enemy tanks. |
||
| − | Not tested on any other game mode. You should usually camp outside the enemy base with a bullet spammer, but if you are on your own be very careful. You have very high HP so don't be to worried about being killed. |
||
| − | | <poll> |
||
| − | Is Blitz3r a good build? :3 |
||
| − | Best Build Ever |
||
| − | Of Course! |
||
| − | Nope.avi |
||
| − | </poll> |
||
|} |
|} |
||
| + | [[File:Gunner-0.png|left|thumb|35x35px]] |
||
| − | === [[Gunner]] === |
+ | === [[Gunner]] (не предельный ярус) === |
| − | {| class="wikitable |
+ | {| class="wikitable mw-collapsible mw-collapsed" style="width: 100%" |
|- |
|- |
||
| + | ! Танк |
||
| − | ! Tank |
||
| + | ! Название |
||
| − | ! Build Name |
||
| + | ! width="20%" |Сборка |
||
| − | ! Build |
||
| + | ! Описание |
||
| − | ! Description |
||
| − | ! Vote |
||
|- |
|- |
||
| '''[[Gunner]]''' |
| '''[[Gunner]]''' |
||
| '''''Weakling''''' |
| '''''Weakling''''' |
||
| '''3, 3, 0, 7, 7, 6, 7, 0''' |
| '''3, 3, 0, 7, 7, 6, 7, 0''' |
||
| − | | It's hard to prioritize upgrades in [[FFA]], so it's recommended that you play in [[2 Teams]] or [[4 Teams]]. If you do play in [[FFA]], be sure to spread out your upgrades for the earlier levels. If you play in [[2 Teams]] or [[4 Teams]], on the other hand, upgrade [[Stats|Bullet Penetration, Bullet Damage, Movement Speed and Reload]]. After that, both Health. After you reach Level 30, increase your Bullet Speed and Movement Speed for maximum use of your build. |
||
| − | | <poll> |
||
| − | Is Weakling a good build? |
||
| − | Yes |
||
| − | No |
||
| − | Too weak |
||
| − | </poll> |
||
|- |
|- |
||
| '''[[Gunner]]''' |
| '''[[Gunner]]''' |
||
| − | | '''''Unnamed''''' |
+ | | '''''Unnamed (рус. Не названный)''''' |
| '''2, 5, 0, 1(or 2), 7, 7, 7, 7''' |
| '''2, 5, 0, 1(or 2), 7, 7, 7, 7''' |
||
| − | | More info coming soon. |
||
| − | | <poll> |
||
| − | Is Unnamed a good build? |
||
| − | Yes |
||
| − | No |
||
| − | Unnamed |
||
| − | </poll> |
||
|} |
|} |
||
| + | [[File:Sprayer-0.png|left|thumb|35x35px]] |
||
=== [[Sprayer]] === |
=== [[Sprayer]] === |
||
| − | {| class="wikitable |
+ | {| class="wikitable mw-collapsible mw-collapsed" style="width: 100%" |
|- |
|- |
||
| + | ! Танк |
||
| − | ! Tank |
||
| + | ! Название |
||
| − | ! Build Name |
||
| + | ! width="20%" |Сборка |
||
| − | ! Build |
||
| + | ! Описание |
||
| − | ! Description |
||
| − | ! Vote |
||
|- |
|- |
||
| '''[[Sprayer]]''' |
| '''[[Sprayer]]''' |
||
| − | | '''''Slow But Powerful''''' |
+ | | '''''Slow But Powerful (рус. Медленный но сильный)''''' |
| '''7, 5, 0, 0, 7, 7, 7, 0 ''' |
| '''7, 5, 0, 0, 7, 7, 7, 0 ''' |
||
| − | | The over-used Sprayer, when it was released, had a [[Stats|high damage and high health build. High regeneration and max health]] makes this tank hard to kill even if you get past the max penetration and max reload bullet shield of a very fast shooting tank. The only downfall about this build is that the tank is very slow with slow bullet speed, making it difficult to kill other tanks, especially fast ones. |
||
| − | | <poll> |
||
| − | Is Slow But Powerful a good build? |
||
| − | Yes |
||
| − | No |
||
| − | </poll> |
||
|- |
|- |
||
| '''[[Sprayer]]''' |
| '''[[Sprayer]]''' |
||
| '''''Fragile Bullet Spammer''''' |
| '''''Fragile Bullet Spammer''''' |
||
| '''3, 2, 0, 7, 7, 7, 7, 0''' |
| '''3, 2, 0, 7, 7, 7, 7, 0''' |
||
| − | | This build is all about the bullets. You can use your bullets to counter even the biggest bullets ([[Arena Closer]]'s, [[Destroyer]]'s, etc.) and [[Sniper]]'s Bullets. Get hit by one stray Sniper bullet, and you'll be dying. Use this build in [[2 Teams]] and [[4 Teams]] only when your team is winning, and also use this in [[Domination]] as a single target tank. |
||
| − | | <poll> |
||
| − | Is Fragile Bullet Spammer a good build? |
||
| − | Yes |
||
| − | No |
||
| − | </poll> |
||
|- |
|- |
||
| '''[[Sprayer]]''' |
| '''[[Sprayer]]''' |
||
| '''''Impenetrable''''' |
| '''''Impenetrable''''' |
||
| '''7, 2, 0, 3, 7, 7, 7, 0''' |
| '''7, 2, 0, 3, 7, 7, 7, 0''' |
||
| − | | With this build, you can out-penetrate most tanks and slay them. If you get hit, it shouldn't be a problem as your Health Regen will stop it quickly. |
||
| − | | <poll> |
||
| − | Is Impenetrable a good build? |
||
| − | Yes |
||
| − | No |
||
| − | Got Penetrated |
||
| − | </poll> |
||
|} |
|} |
||
| + | [[File:Auto Gunner-0.png|left|thumb|35x35px]] |
||
=== [[Auto Gunner]] === |
=== [[Auto Gunner]] === |
||
| − | {| class="wikitable |
+ | {| class="wikitable mw-collapsible mw-collapsed" style="width: 100%" |
|- |
|- |
||
| + | ! Танк |
||
| − | ! Tank |
||
| + | ! Название |
||
| − | ! Build Name |
||
| + | ! width="20%" |Сборка |
||
| − | ! Build |
||
| + | ! Описание |
||
| − | ! Description |
||
| − | ! Vote |
||
|- |
|- |
||
| '''[[Auto Gunner]]''' |
| '''[[Auto Gunner]]''' |
||
| '''''Tracker''''' |
| '''''Tracker''''' |
||
| '''0, 0, 0, 7, 7, 7, 6, 6''' |
| '''0, 0, 0, 7, 7, 7, 6, 6''' |
||
| − | | The build allows you to track your enemies down (the Auto Turret shows tanks that are off-screen) and kill them easily. As a [[Gunner]], it still has its weakness: low penetration. That's why you should avoid the [[Twin]] branch (except if they are low on health). Surprisingly, you can out-trade [[Destroyer]]s and [[Hybrid]]s, both the bullet damage ones and the rammer ones. Other tank types should be no problem because of your speed and bullet rain. It's recommend to stay with [[Machine Gun]] until level 45 but you can go [[Gunner]] at level 30. Useful in all game modes but best in [[FFA]]. |
||
| − | | <poll> |
||
| − | Is Tracker a good build? |
||
| − | Yes |
||
| − | No |
||
| − | </poll> |
||
|} |
|} |
||
| + | [[File:Flank-0.png|left|thumb|45x45px]] |
||
| − | ==[[Flank Guard]] Branch== |
||
| + | ==Ветка [[Flank Guard]]== |
||
| − | {| class="wikitable sortable mw-collapsible mw-collapsed" style="width: 100%" |
||
| + | |||
| + | {| class="wikitable mw-collapsible mw-collapsed" style="width: 100%" |
||
|- |
|- |
||
| + | ! Танк |
||
| − | ! Tank |
||
| + | ! Название |
||
| − | ! Build Name |
||
| + | ! width="20%" |Сборка |
||
| − | ! Build |
||
| + | ! Описание |
||
| − | ! Description |
||
| − | ! Vote |
||
|- |
|- |
||
| '''[[Flank Guard]]''' |
| '''[[Flank Guard]]''' |
||
| '''''N/A''''' |
| '''''N/A''''' |
||
| '''7, 2, 0, 6, 6, 6, 6, 0''' |
| '''7, 2, 0, 6, 6, 6, 6, 0''' |
||
| − | | The six points into reload and damage allows you to spam bullets and kill faster. Incoming bullets are unlikely to hit you as they will most likely break against your shots. If you do get hit, the seven points of [[Stats|health regeneration]] will quickly fix the problem. |
||
| − | | <poll> |
||
| − | Is N/A a good build? |
||
| − | Yes |
||
| − | No |
||
| − | N/A |
||
| − | </poll> |
||
|} |
|} |
||
| + | [[File:Tri-angle-0.png|left|thumb|35x35px]] |
||
| − | === [[Tri-Angle]] === |
+ | === [[Tri-Angle]] (не предельный ярус) === |
| − | {| class="wikitable |
+ | {| class="wikitable mw-collapsible mw-collapsed" style="width: 100%" |
|- |
|- |
||
| + | ! Танк |
||
| − | ! Tank |
||
| + | ! Название |
||
| − | ! Build Name |
||
| + | ! width="20%" |Сборка |
||
| − | ! Build |
||
| + | ! Описание |
||
| − | ! Description |
||
| − | ! Vote |
||
|- |
|- |
||
!Tri-angle |
!Tri-angle |
||
| Строка 1186: | Строка 677: | ||
Rammer |
Rammer |
||
!7,7,7,0,0,0,0,7 |
!7,7,7,0,0,0,0,7 |
||
| − | ! |
||
| − | |||
| − | This build can surprise players with speed and a ramming build. The high health and speed allows you to flee combat if health gets too low. You can circle around concentrated bullet classes while can survive against spread out bullet classes. It's faster than most drones if you spend the rest of the points on reload. It's not recommended to fight smasher branches, trappers, or multiple players. To use this build to it's maximum potential, you must be good at maneuvering and paying attention to health of both you and your enemy. |
||
| − | |||
| − | ! |
||
|- |
|- |
||
| '''For All [[Tri-Angle]] Upgrades''' |
| '''For All [[Tri-Angle]] Upgrades''' |
||
| '''''Balanced-Offensive''''' |
| '''''Balanced-Offensive''''' |
||
| '''3, 0, 3, 3, 7, 7, 7, 3''' |
| '''3, 0, 3, 3, 7, 7, 7, 3''' |
||
| − | | This build can be played with all [[Tri-Angle]]'s subclasses as the point of this build is chase and go for the kill. Those heavy bullet upgrades and little bullet speed will make a shield in front of you and block enemy bullets. Even 90% of [[Streamliner|Streamliner's]] bullet could be blocked due to their low penetration. Don't take up against [[Destroyer]]s/[[Hybrid]]s as one direct hit of their bullets will surely kill you. Circling them is a good idea, but the only upgrade of the [[Tri Angle|Tri-Angle]] that can actually damage them while circling them is the [[Fighter]], due to the more damage of the back barrels and having side barrels. Enganging a [[Triplet]] or [[Overlord]] is risky, but can be done if you're able to manoeuver your tank well. If you want to sacrifice some Bullet Speed for Movement Speed, use Booster or Fighter as Tri-Angle will outrun the bullets if you do this. |
||
| − | | <poll> |
||
| − | Is Balanced-Offensive a good build? |
||
| − | Yes |
||
| − | No |
||
| − | </poll> |
||
|- |
|- |
||
| '''[[Tri-Angle]]''' |
| '''[[Tri-Angle]]''' |
||
| '''''Fast and Furious''''' |
| '''''Fast and Furious''''' |
||
| '''4, 4, 0, 4, 7, 7, 7, 0''' |
| '''4, 4, 0, 4, 7, 7, 7, 0''' |
||
| − | | [[Tri-Angle]] (and its upgrades) have the highest movement speed of any tank which enables them to catch most of the tanks on the server (even if they are running away). High [[Stats|bullet speed, damage, reload and penetration]] guarantees a quick death for your rivals. You also need some bullet speed to not outrun your own bullets. A little bit of health is necessary to keep you alive under a bullet shower. |
||
| − | | <poll> |
||
| − | Is Fast and Furious a good build? |
||
| − | Yes |
||
| − | No |
||
| − | 2fast4me |
||
| − | </poll> |
||
|- |
|- |
||
| '''[[Tri-Angle]]''' |
| '''[[Tri-Angle]]''' |
||
| '''''Demon god''''' |
| '''''Demon god''''' |
||
| '''2, 4, 7, 7, 1, 0, 7, 5''' |
| '''2, 4, 7, 7, 1, 0, 7, 5''' |
||
| − | | Your [[Stats|speed]] enables you to run around very fast, bump into tanks and increase your agility (assuming you point your mouse in the direction you want to move). This build focuses on [[Stats|Body Damage]]. Increasing [[Stats|Maximum Health]] is pretty sacrificial to your defense, but you can do that too. |
||
| − | | <poll> |
||
| − | Is Demon god a good build? |
||
| − | Yes |
||
| − | No |
||
| − | </poll> |
||
|} |
|} |
||
| + | [[File:Auto 5-2.png|left|thumb|35x35px]] |
||
=== [[Auto 5]] === |
=== [[Auto 5]] === |
||
| − | {| class="wikitable |
+ | {| class="wikitable mw-collapsible mw-collapsed" style="width: 100%" |
|- |
|- |
||
| + | ! Танк |
||
| − | ! Tank |
||
| + | ! Название |
||
| − | ! Build Name |
||
| + | ! width="20%" |Сборка |
||
| − | ! Build |
||
| + | ! Описание |
||
| − | ! Description |
||
| − | ! Vote |
||
|- |
|- |
||
| '''[[Auto 5]]''' |
| '''[[Auto 5]]''' |
||
| '''''Pressured Lockdown!''''' |
| '''''Pressured Lockdown!''''' |
||
| '''0, 6, 1, 7, 7, 7, 2, 3''' |
| '''0, 6, 1, 7, 7, 7, 2, 3''' |
||
| − | | This tank is for farming and assassinating at the same time. The 3 upgrades in Movement Speed allows you to follow other players and patrol around the middle of the map. Only good at [http://diepio.wikia.com/wiki/FFA FFA] because on other modes, this tank will prevent other players from getting experience.<br />'''Strategy'''<br />Your bullets are extremely strong which means immense damage. 3 of your turrets can point at the same target! Avoid all Sniper branch classes (if they are low health you can execute them easily). [[Destroyer]]s and [[Hybrid]]s are not a big threat. Other tanks are just easy to kill. With enough practice, you can kill even bullet build [[Booster]]s! You can even control 1/6 of the map while doing absolutely nothing. Also, you can sacrifice 3 points from Max Health for Health Regen if you want. If you want to take control of turrets, turn on Auto Fire.<br />'''Farming'''<br />The easiest part. Just let the tank go and get your free experience points from level 30. Just remember -- DON'T go anywhere near the middle of the map if you are not close to Level 45. |
||
| − | | <poll> |
||
| − | Is Pressured Lockdown! a good build? |
||
| − | Yes |
||
| − | No |
||
| − | </poll> |
||
|- |
|- |
||
| '''[[Auto 5]]''' |
| '''[[Auto 5]]''' |
||
| − | | '''''Auto Turret''''' |
+ | | '''''Auto Turret (рус. Авто турель)''''' |
| '''2, 2, 0, 7, 7, 7, 7, 1''' |
| '''2, 2, 0, 7, 7, 7, 7, 1''' |
||
| − | | Because of the tank's Auto Turrets, it will attack nearby enemies and [[polygons]] (even out of our FOV). It has all Bullet Stats maxed out, enabling you to kill enemies with high efficiency bullets, but has low defense and speed (in other words, don't get caught by a [[Smasher]] or [[Booster]]). Best used on [[FFA]]. If you want to take control of turrets, turn on Auto Fire. |
||
| − | | <poll> |
||
| − | Is Auto Turret a good build? |
||
| − | Yes |
||
| − | No |
||
| − | </poll> |
||
|- |
|- |
||
|[[Auto 5|'''Auto 5''']] |
|[[Auto 5|'''Auto 5''']] |
||
|'''''TOUHOU DODGING SKILLZ FTW''''' |
|'''''TOUHOU DODGING SKILLZ FTW''''' |
||
|'''0, 0, 0, 5, 7, 7, 7, 7''' |
|'''0, 0, 0, 5, 7, 7, 7, 7''' |
||
| − | |Aww, somebody can't dodge? Well, TOO BAD. MUAHAHAHAHAHA |
||
| − | | <poll> |
||
| − | Is TOUHOU DODGING SKILLZ FTW a good build? |
||
| − | Yes |
||
| − | No |
||
| − | Needs moar dakka |
||
| − | </poll> |
||
|} |
|} |
||
| + | [[File:Boooster-0.png|left|thumb|35x35px]] |
||
=== [[Booster]] === |
=== [[Booster]] === |
||
| − | {| class="wikitable |
+ | {| class="wikitable mw-collapsible mw-collapsed" style="width: 100%" |
|- |
|- |
||
| + | ! Танк |
||
| − | ! Tank |
||
| + | ! Название |
||
| − | ! Build Name |
||
| + | ! width="20%" |Сборка |
||
| − | ! Build |
||
| + | ! Описание |
||
| − | ! Description |
||
| − | ! Vote |
||
|- |
|- |
||
| '''[[Booster]]''' |
| '''[[Booster]]''' |
||
| − | | '''''Speedy''''' |
+ | | '''''Speedy (рус.Быстрый)''''' |
| '''2, 2, 0, 4, 4, 7, 7, 7''' |
| '''2, 2, 0, 4, 4, 7, 7, 7''' |
||
| − | | This build will give you [[Stats|immense damage and fast reload]]. Approach other players and kill them from close up. The health is really low, but bullet penetration is pretty high, so you can stop most bullets from other players. |
||
| − | | <poll> |
||
| − | Is Speedy a good build? |
||
| − | Yes |
||
| − | No |
||
| − | </poll> |
||
|- |
|- |
||
| '''[[Booster]]''' |
| '''[[Booster]]''' |
||
| '''''Fastest Tank Alive''''' |
| '''''Fastest Tank Alive''''' |
||
| '''0, 0, 0, 7, 6, 6, 7, 7''' |
| '''0, 0, 0, 7, 6, 6, 7, 7''' |
||
| − | | You are going to be the fastest tank on the server (exceptions are if any Tri-Angles are on the server), as well as being the most vulnerable. You must try to avoid direct combat with any high level tanks. However, you can kill near level tanks as well as stronger ones if you can surprise attack them. Because you are (with some exceptions) the fastest tank on the server, most of the tanks (except [[Sniper]] variants) will not notice you until you get pretty close to them. Beware the Snipers: you are certainly a hard target for them, but the trade-off is that you are also a one shot kill for them. Even though Snipers are your nightmare, [[Overseer]]-class tanks are not. Why? The Drones simply can't catch up. If you are a speed maniac, Tri-Angle is a better option (Booster is roughly 10 percent slower than Tri-Angle). |
||
| − | | <poll> |
||
| − | Is Fastest Tank Alive a good build? |
||
| − | Yes |
||
| − | No |
||
| − | Not fast enough -4/8 IGN |
||
| − | </poll> |
||
|- |
|- |
||
| '''[[Booster]]''' |
| '''[[Booster]]''' |
||
| '''''Speed Ram''''' |
| '''''Speed Ram''''' |
||
| '''5, 7, 7, 0, 0, 0, 7, 7''' |
| '''5, 7, 7, 0, 0, 0, 7, 7''' |
||
| − | | This ramming build is faster than the Boosted Ramming build and the Jellyfish Build. Unlike Boosted Ramming, it trades [[Stats|health for speed]]. Just look at Boosted Ramming to see why this build is so good with the added speed. This build works better with Tri-Angle because it is a faster tank than the Booster. |
||
| − | | <poll> |
||
| − | Is Speed Ram a good build? |
||
| − | Yes |
||
| − | No |
||
| − | </poll> |
||
|- |
|- |
||
| '''[[Booster]]''' |
| '''[[Booster]]''' |
||
| '''''Boosted Ramming''''' |
| '''''Boosted Ramming''''' |
||
| '''7, 7, 7, 0, 0, 0, 5, 7''' |
| '''7, 7, 7, 0, 0, 0, 5, 7''' |
||
| − | | It will make you very dangerous at close range. You can seek, track, and kill all players quickly. They can't flee. You just have to ram. You must avoid a fight with [[Gunner]]s and [[Destroyer]]s with high bullet damage. You can avoid bullets and resist most damage but you must beware of players with [[Stats|high health points and body damage]]. This build works better with Tri-Angle because it is a faster tank than the Booster. |
||
| − | | <poll> |
||
| − | Is Boosted Ramming a good build? |
||
| − | Yes |
||
| − | No |
||
| − | </poll> |
||
|- |
|- |
||
| '''[[Booster]]''' |
| '''[[Booster]]''' |
||
| '''''Hit n' Run''''' |
| '''''Hit n' Run''''' |
||
| '''5, 7, 0, 0, 7, 7, 7, 0''' |
| '''5, 7, 0, 0, 7, 7, 7, 0''' |
||
| − | | This build focuses on causing huge destruction extremely quickly. With this build, you can take many, many hits as well as cause some insane damage yourself. Once you have defeated your target, you boost yourself to your next. Upgrade your bullet damage and penetration first, then upgrade your reload speed, and then finally your health stats. If you get to first place in FFA, patrol the whole map looking for leaderboard players.<br />P.S. Beware of Destroyers/Hybrids. To counter them, simply take shots and run, and keep repeating, all at long range.<br />P.P.S. This build also works with the [[Fighter]], but you will not have the critical speed advantage. |
||
| − | | <poll> |
||
| − | Is Hit n' Run a good build? |
||
| − | Yes |
||
| − | No |
||
| − | </poll> |
||
|- |
|- |
||
| '''[[Booster]]''' |
| '''[[Booster]]''' |
||
| '''''Master of Deception''''' |
| '''''Master of Deception''''' |
||
| '''2, 4, 7, 0, 6, 7, 7, 0''' or '''2, 3, 7, 0, 7, 7, 7, 0''' |
| '''2, 4, 7, 0, 6, 7, 7, 0''' or '''2, 3, 7, 0, 7, 7, 7, 0''' |
||
| − | | This build focuses on bullet spamming and ramming at the same time! You can out-penetrate other tanks pretty well if you flank them. Do not put in any movement speed because you can chase people down fast anyways. Other tanks will be fooled and may try to engage you at close range, which will make them an easy target. It is recommended to never engage other Level 45 bullet spammers face-on (Triplet and Sprayers mainly). Catch them by surprise when they are focused on another target. Using this tank, however, beware of the Destroyers and Snipers. Flank them hard before taking them out, and if you are low on health, spray some bullets with your rear cannon to take them out. |
||
| − | | <poll> |
||
| − | Is Master of Deception a good build? |
||
| − | Yes |
||
| − | No |
||
| − | </poll> |
||
|- |
|- |
||
| '''[[Booster]]''' |
| '''[[Booster]]''' |
||
| '''''All in with it''''' |
| '''''All in with it''''' |
||
| '''0, 0, 0, 5, 7, 7, 7, 7''' |
| '''0, 0, 0, 5, 7, 7, 7, 7''' |
||
| − | | This build is for people who don't like ramming, but still like the satisfying kills. You can zoom around and kill tanks easily, and can even take down a full health Smasher!<br />'''Warning'''<br />Be careful of your surrondings. Use the mini-map to your advantage as you can run straight into enemy base. Look at the mini-map so you can retreat if you get too close to enemy base, since with your low health you can be killed easily. Also, NEVER APPROACH THE PENTAGON NEST. The Pentagons can surrond you and you can get killed.<br />'''Strategy'''<br />STAY ON THE MOVE. If you stand still you can be killed very easily. Avoid bullet spammers like Triplets and Octo Tanks. Only take down slow, unprepared tanks or tanks with little Bullet Penetration. |
||
| − | | <poll> |
||
| − | Is All in with it a good build? |
||
| − | Yes |
||
| − | No |
||
| − | </poll> |
||
|- |
|- |
||
| '''[[Booster]]''' |
| '''[[Booster]]''' |
||
| '''''Tanky Lightning''''' |
| '''''Tanky Lightning''''' |
||
| '''7, 7, 5, 0, 0, 0, 7, 7''' |
| '''7, 7, 5, 0, 0, 0, 7, 7''' |
||
| − | | This is for getting the world record for running from Arena Closers. Don't use this build in FFA or you might be a target for higher/slightly lower people on the leaderboard. The 5 body damage is for taking less damage from polygons like pentagons and triangles.<br />'''Strategy'''<br />This build is used best in Domination by letting the enemy Dominator target you. Strafe back and forth to be careful not to accidentally let your teammates get hit from the bullets. If it looks like one of your high level teammates are about to die, get there as fast as you can and use yourself as a meatshield. If a Dominator's bullet hits you, make sure you move quick as it takes two shots to kill you. If you have low health, retreat and heal until you have healed, then immediately get back to the Dominator because your team needs maximum assistance. |
||
| − | | <poll> |
||
| − | Is Tanky Lightning a good build? |
||
| − | Yes |
||
| − | No |
||
| − | </poll> |
||
|- |
|- |
||
| '''[[Booster]]''' |
| '''[[Booster]]''' |
||
| '''''Invincible Hulk''''' |
| '''''Invincible Hulk''''' |
||
| '''2, 7, 0, 0, 6, 6, 7, 5''' |
| '''2, 7, 0, 0, 6, 6, 7, 5''' |
||
| − | | Tanky and does a ton of damage. 1.4 mil in FFA.<br />'''Strategy'''<br />This build is sure is amazing in FFA. First off, the max health will keep you alive when trying to kill people and when running. It also serves as a façade that tricks people into thinking you're body damage. The extra room that they will allot to you unconsiously is crucial to this build.<br />The bullet damage and bullet pen are just for raw tank destruction. Since you don't have bullet speed, the strategy is to run directly at your target, using your bullet cloud as a shield and running straight into them as if you were a ramming Booster. They won't expect you to have such high bullet damage and will pay attention more to your body. This subtlety allows for your bullets to get to your target and shave their health in an instant. *Note* Make sure to watch your health as you dive. Some classes when built full damage CAN get through your bullet storm. The only way to learn when to run is through experience.<br />Have fun clearing everyone on the server! |
||
| − | | <poll> |
||
| − | Is Invincible Hulk a good build? |
||
| − | Yes |
||
| − | No |
||
| − | Not Invincible |
||
| − | </poll> |
||
|- |
|- |
||
| '''[[Booster]]/[[Fighter]]''' |
| '''[[Booster]]/[[Fighter]]''' |
||
| − | | Hit and Run |
+ | | '''Hit and Run (рус.Ударь и беги)''' |
| '''3, 2, 0, 4, 5, 5, 7, 7''' |
| '''3, 2, 0, 4, 5, 5, 7, 7''' |
||
| − | | Optimal build for dominator or FFA. This build will make you well, very ''fast''. The movement speed and reload will make your tank the fastest possible, and you will be able to run from every threat. The penetration is there to help you get through high penetration bullets, but be careful when approaching any maxed [[Stats|penetration]] bullets, [[Destroyer]], or Dominators. Also a great build for running away from Arena Closers. |
||
| − | | <poll> |
||
| − | Is Hit and Run a good build? |
||
| − | Yes |
||
| − | No |
||
| − | </poll> |
||
|- |
|- |
||
|'''[[Booster]]''' |
|'''[[Booster]]''' |
||
|'''''The Armored Bugatti '''''(TAB) |
|'''''The Armored Bugatti '''''(TAB) |
||
|'''7, 6, 7, 0, 0, 0, 6, 7''' |
|'''7, 6, 7, 0, 0, 0, 6, 7''' |
||
| − | |Avoid high-DPS tanks like '''[[Triplet]]''', as they will mow you down. Attack slow-moving tanks with this. |
||
| − | |<poll> |
||
| − | Is The Armored Bugatti a good build? |
||
| − | Yes |
||
| − | No |
||
| − | Too expensive! |
||
| − | </poll> |
||
|- |
|- |
||
|'''[[Booster]]''' |
|'''[[Booster]]''' |
||
|'''''Careful / Bullet Shield''''' |
|'''''Careful / Bullet Shield''''' |
||
|'''4, 3, 0, 2, 7, 2, 7, 4 (+4)''' |
|'''4, 3, 0, 2, 7, 2, 7, 4 (+4)''' |
||
| − | |This is a good chaser build. The high penetration and reload should keep most bullets coming head on from hitting you. You'll also move pretty fast (duh) and you should be careful not to run into any other tanks, as you will probably get rekt. The four extra points allow for adjustment to whatever is going on in your server. |
||
| − | |<poll> |
||
| − | Is Careful / Bullet Shield a good build? |
||
| − | Yes |
||
| − | No |
||
| − | </poll> |
||
|- |
|- |
||
|'''[[Booster]]''' |
|'''[[Booster]]''' |
||
|'''''Wall Buster''''' |
|'''''Wall Buster''''' |
||
|'''0, 7, 7, 0, 5, 7, 7, 0''' |
|'''0, 7, 7, 0, 5, 7, 7, 0''' |
||
| − | |This is for team [[2 Teams]] only because of no regeneration. You have nice speed and your bullets and health can pierce most bullet walls for a hit-and-run. Then retreat to the base to regenerate. |
||
| − | |<poll> |
||
| − | Is Wall Buster a good build? |
||
| − | Yes |
||
| − | No |
||
| − | </poll> |
||
|} |
|} |
||
| + | [[File:Fighterr-0.png|left|thumb|35x35px]] |
||
=== [[Fighter]] === |
=== [[Fighter]] === |
||
| − | {| class="wikitable |
+ | {| class="wikitable mw-collapsible mw-collapsed" style="width: 100%" |
|- |
|- |
||
| + | ! Танк |
||
| − | ! Tank |
||
| + | ! Название |
||
| − | ! Build Name |
||
| + | ! width="20%" |Сборка |
||
| − | ! Build |
||
| + | ! Описание |
||
| − | ! Description |
||
| − | ! Vote |
||
|- |
|- |
||
| '''[[Fighter]]''' |
| '''[[Fighter]]''' |
||
| '''''Ram Brawler''''' |
| '''''Ram Brawler''''' |
||
| '''7, 7, 7, 0, 0, 0, 5, 7''' |
| '''7, 7, 7, 0, 0, 0, 5, 7''' |
||
| − | | It will make you very dangerous at close range. You can seek, track, and kill all players quickly. They can't flee. You just have to ram. You must avoid a fight with [[Gunner]]s and [[Destroyer]]s with high bullet damage. You can avoid bullets and resist most damage but you must beware of players with [[Stats|high health points and body damage]]. |
||
| − | | <poll> |
||
| − | Is Ram Brawler a good build? |
||
| − | Yes |
||
| − | No |
||
| − | </poll> |
||
|- |
|- |
||
| [http://diepio.wikia.com/wiki/Octo_Tank Octotank] |
| [http://diepio.wikia.com/wiki/Octo_Tank Octotank] |
||
| '''''Noob Hunter''''' |
| '''''Noob Hunter''''' |
||
| '''7, 7, 7,0, 0,0, 7''' |
| '''7, 7, 7,0, 0,0, 7''' |
||
| − | | This Class is good at hunting noobs with body damage (also known as voldemort the nobb killer) |
||
| − | | <poll> |
||
| − | Is The Shoot, Ram, and Run a good build? |
||
| − | Yes |
||
| − | No |
||
| − | </poll> |
||
|- |
|- |
||
| '''[[Fighter]]''' |
| '''[[Fighter]]''' |
||
| '''''The True Fighter''''' |
| '''''The True Fighter''''' |
||
| '''7, 7, 0, 5, 5, 5, 2, 2''' |
| '''7, 7, 0, 5, 5, 5, 2, 2''' |
||
| − | | Why would a Fighter be called that if it is mostly used for ramming? Here's a build with some chest-hair. It has great health and regeneration, overall great reload/movement speed to keep even with equal bullet damage, penetration and speed. It has an equal chance of hitting, penetrating and severely damaging enemies.<br />'''WARNING''': Great against distracted enemies, bad against bullet spammers and Snipers. |
||
| − | Finally a fighting Fighter, not meant for ramming :) |
||
| − | | <poll> |
||
| − | Is The True Fighter a good build? |
||
| − | Yes |
||
| − | No |
||
| − | Too much truth 17/12 IGN 2019 |
||
| − | </poll> |
||
|- |
|- |
||
| '''[[Fighter]]''' |
| '''[[Fighter]]''' |
||
| '''''The Killer Tank!''''' |
| '''''The Killer Tank!''''' |
||
| '''2, 2, 0, 5, 7, 7, 7, 3''' |
| '''2, 2, 0, 5, 7, 7, 7, 3''' |
||
| − | | This tank is meant for chasing down enemies while having good health. You can go for vengeance or kill the innocent low-level tanks. This WILL GUARANTEED get you 1st UNLESS you do extremely stupid stuff. |
||
| − | | <poll> |
||
| − | Is The Killer Tank! a good build? |
||
| − | Yes |
||
| − | No |
||
| − | </poll> |
||
|- |
|- |
||
| '''[[Fighter]]''' |
| '''[[Fighter]]''' |
||
| '''''Head-on Attack''''' |
| '''''Head-on Attack''''' |
||
| '''6, 0, 0, 0, 7, 7, 7, 6''' |
| '''6, 0, 0, 0, 7, 7, 7, 6''' |
||
| − | | This build is meant purely for attacking, retreating to regenerate, then attacking again. You can rapidly rise up the leaderboard by farming at the [[Pentagon Nest]] or going around the map and killing lower level tanks. Even rammers will have difficulty staying alive when you attack as your slow bullets actually form a shield around you, absorbing bullets and doing heavy damage to anyone who gets too close. Your extreme speed will allow you to escape if you take a lot of hits (play this like a glass cannon build). |
||
| − | | <poll> |
||
| − | Is Head-on Attack a good build? |
||
| − | Yes |
||
| − | No |
||
| − | </poll> |
||
|- |
|- |
||
| '''[[Fighter]]''' |
| '''[[Fighter]]''' |
||
| − | |''The Hero'' |
+ | |'''The Hero (рус. Герой)''' |
|'''3,3,7,0,5,5,7,3''' |
|'''3,3,7,0,5,5,7,3''' |
||
| − | |This is the ultimate tank, as it can ram and shoot. Nothing can really match this tank when used properly. Although it can do both, this tank thrives when chasing tanks. It will do well against sniper builds and against bullet spammers. However when a less than a third of your health is remaining, escaping is vital. Do not attempt to take on a lot of bullet spammers, as they will surely kill you. This tank will supply you with decent health for survival and speed to run away or chase. Its power of shooting will wear down an opponent before you go for the killing blow, with a ram. Best used in [[2 Teams]], [[4 Teams]], and FFA. |
||
| − | | <poll> |
||
| − | Is The Hero a good build? |
||
| − | Yes |
||
| − | No |
||
| − | </poll> |
||
|- |
|- |
||
| |
| |
||
| + | '''[[Fighter]]''' |
||
| − | + | |'''Rammer Killer''' |
|
| − | |||
| − | |'''Rammer''''''Killer''' |
||
|'''0, 0, 0, 7, 7, 6, 7. 6''' |
|'''0, 0, 0, 7, 7, 6, 7. 6''' |
||
| − | |This tank is great for catching and destroying other rammers if you have enough skills to use it. Using a Glass Cannon is a high risk, highly rewarding build. |
||
| − | This is also a very agressive [[Fighter|'''Fighter''']] build. |
||
| − | |||
| − | * Great for killing '''[[Smasher]]'''-Branch Classes, but beware they can turn back and ram you anytime, so the 7 Bullet Speed will help you shoot them little bit farther away. |
||
| − | * Perfect Counter to [[Tri-Angle|'''Tri-Angle''']]-Branch with ram builds, you will catch up to [[Booster|'''Boosters''']]'''.''' |
||
| − | * Not so good aginast '''[[Destroyer]]'''-Branch with Ram builds, because they are faster than you. |
||
| − | | |
||
|} |
|} |
||
| + | [[File:Octotank-0.png|left|thumb|35x35px]] |
||
=== [[Octo Tank]] === |
=== [[Octo Tank]] === |
||
| − | {| class="wikitable |
+ | {| class="wikitable mw-collapsible mw-collapsed" style="width: 100%" |
|- |
|- |
||
| + | ! Танк |
||
| − | ! Tank |
||
| + | ! Название |
||
| − | ! Build Name |
||
| + | ! width="20%" |Сборка |
||
| − | ! Build |
||
| + | ! Описание |
||
| − | ! Description |
||
| − | ! Vote |
||
|- |
|- |
||
| '''[[Octo Tank]]''' |
| '''[[Octo Tank]]''' |
||
| − | | '''''Champion''''' |
+ | | '''''Champion (рус. Чемпион)''''' |
| '''7, 7, 0, 0, 7, 5, 7, 0''' |
| '''7, 7, 0, 0, 7, 5, 7, 0''' |
||
| − | | This tank build focuses on defense and for survival. With this build, your bullets will be extremely difficult to penetrate due to having maximum penetration. Furthermore, with max reload, it will be difficult for many tanks to penetrate your barrage of high health bullets due to having [[Stats|maximum penetration]]. The high health and health regen makes it even harder for you to get injured and die. |
||
| − | | <poll> |
||
| − | Is Champion a good build? |
||
| − | Yes |
||
| − | No |
||
| − | </poll> |
||
|- |
|- |
||
| '''[[Octo Tank]]''' |
| '''[[Octo Tank]]''' |
||
| '''''Unstoppable Satisfaction''''' |
| '''''Unstoppable Satisfaction''''' |
||
| '''2, 6, 0, 7, 6, 6, 5, 1''' |
| '''2, 6, 0, 7, 6, 6, 5, 1''' |
||
| − | | This tank build focuses on mainly (wide-range) offense, survival and maximum scoring. This build will make others around you constantly on the move. It scares low-level players away and gives you decent protection if you hold left and right click (shooting all bullets at once) and gives you a ton of score. Ultimately makes you less vulnerable to other enemy tanks drastically compared to other builds of the [[Octo Tank]]. This build isn't for challenging or "1v1s", it's for surviving major conflict with dangerous tanks and high scoring in [[FFA]]. You can also switch out points for Bullet Speed and put it towards [[Stats|movement speed]] since the Octo Tank already has good bullet speed but the base movement speed is really low so it is not so easy to escape if you're at low health. |
||
| − | <br />'''Strategy'''<br />Surround the middle, but don't go inside it. Patrol a decent sway of orbit around the middle. This provides more of a greater increase in getting score and less chance of meeting high (risk) threat enemies. The only things that can be a great danger to you in this build are Triplets, Overseer branches and fast moving tanks (especially ramming builders - this can be countered by pressing C and E). |
||
| − | | <poll> |
||
| − | Is Unstoppable Satisfaction a good build? |
||
| − | Yes |
||
| − | No |
||
| − | </poll> |
||
|- |
|- |
||
| '''[[Octo Tank]]''' |
| '''[[Octo Tank]]''' |
||
| '''''Somewhat Glass tank''''' |
| '''''Somewhat Glass tank''''' |
||
| '''0, 5, 0, 6, 5, 6, 6, 5''' |
| '''0, 5, 0, 6, 5, 6, 6, 5''' |
||
| − | | Use this build for [[2 Teams]]. Farm in the middle of the map to get many points from pentagons. This build is not very good for cornering the enemy team, due to 30s [[Stats|health regeneration]] and somewhat low damage output. The movement speed is for getting out of dangerous situations and defending against [[Tri-Angle]] and its upgrades. The Maximum Health is for tanking bullets and to not get you killed.<br />'''Warning'''<br />Destroying too many pentagons may make your team lose because other players can't level up as quickly to defeat opponents. Always leave some for your teammates so they can level up. |
||
| − | | <poll> |
||
| − | Is Somewhat Glass tank a good build? |
||
| − | Yes |
||
| − | No |
||
| − | </poll> |
||
|- |
|- |
||
| '''[[Octo Tank]]''' |
| '''[[Octo Tank]]''' |
||
| '''''Hurricane''''' |
| '''''Hurricane''''' |
||
| '''5, 0, 0, 3, 7, 7, 4, 7''' |
| '''5, 0, 0, 3, 7, 7, 4, 7''' |
||
| − | | This tank is designed for catching and scoring tons of points while running away/pursuing tanks. The maxed movement speed allow you to run away quickly from focused bullet spammers tanks like [[Triplet]] and [[Hybrid]] and rammers. The maxed penetration and damage can repel all of those [[Drones]] of [[Overseer]]-class tanks. If you want a high score, pressing C and E keys will make you the fastest shooting Hurricane. |
||
| − | | <poll> |
||
| − | Is Bulldozer a good build? |
||
| − | Yes |
||
| − | No |
||
| − | </poll> |
||
|- |
|- |
||
| '''[[Octo Tank]]''' |
| '''[[Octo Tank]]''' |
||
| '''''Human Made Storm''''' |
| '''''Human Made Storm''''' |
||
| '''3, 3, 0, 7, 6, 7, 7, 0''' |
| '''3, 3, 0, 7, 6, 7, 7, 0''' |
||
| − | | This build is designed to make a storm of bullets. Use this in FFA or Domination. If you want to do it, stop firing then go to the crowded place (e.g. the [[Pentagon Nest]]). After that, turn on Auto Fire and Auto Spin. |
||
| − | | <poll> |
||
| − | Is Human Made Storm a good build? |
||
| − | Yes |
||
| − | No |
||
| − | </poll> |
||
|- |
|- |
||
| '''[[Octo Tank]]''' |
| '''[[Octo Tank]]''' |
||
| '''''Grind & Run''''' |
| '''''Grind & Run''''' |
||
| '''2, 1, 0, 2, 7, 7, 7, 7''' |
| '''2, 1, 0, 2, 7, 7, 7, 7''' |
||
| − | | This build is great for FFA. You just go and sit in the middle and farm pentagons. When tanks that have the ability to kill come in the middle, RUN!!!! This is my high score with this build. |
||
| − | | <poll> |
||
| − | Is Grind & Run a good build? |
||
| − | Yes |
||
| − | No |
||
| − | </poll> |
||
|- |
|- |
||
| '''[[Octo Tank]]''' |
| '''[[Octo Tank]]''' |
||
| − | | |
+ | | '''Noob Killer (Убийца Нубов)''' |
| '''3, 7, 7, 0, 6, 6, 5, 0''' |
| '''3, 7, 7, 0, 6, 6, 5, 0''' |
||
| − | | This build is, well, that. Your bullet storm will easily kill any approaching low-level tank and other rammers, and if a tank gets REALLY close then you can just ram into them which will usually kill them. Snipers are pretty dangerous but you should be able to run away quick enough due to your high health. If a Sniper is CHASING you, the bullet storm will kill them. If not, then your body damage will. If a Destroyer gets close, you should be able to weaken the bullets to the point that you can take a few hits. The bullet storm SHOULD be able to kill the Destroyer. This build works really well when combined with C+E. Try it! |
||
| − | | <poll> |
||
| − | Is Noob Killer a good build? |
||
| − | Yes |
||
| − | No |
||
| − | </poll> |
||
|- |
|- |
||
| '''[[Octo Tank]]''' |
| '''[[Octo Tank]]''' |
||
| '''''Anti-Ramming Bullet Spamming''''' |
| '''''Anti-Ramming Bullet Spamming''''' |
||
| '''5, 7, 0, 0, 7, 7, 7, 0''' |
| '''5, 7, 0, 0, 7, 7, 7, 0''' |
||
| − | | This build is REALLY good against anything. If you get the Twin to Lv.45 and then upgrade to Octo Tank (remember NOT to pick Twin Flank), you should be good. Also, remember to ALWAYS USE C+E. |
||
| − | | <poll> |
||
| − | Is Anti-Ramming Bullet Spamming a good build? |
||
| − | Yes |
||
| − | No |
||
| − | </poll> |
||
|} |
|} |
||
| + | [[File:Smasher-1.png|left|thumb|45x45px]] |
||
| − | ==[[Smasher]] |
+ | ==Ветка [[Smasher]]== |
| − | {| class="wikitable |
+ | {| class="wikitable mw-collapsible mw-collapsed" style="width: 100%" |
|- |
|- |
||
| + | ! Танк |
||
| − | ! Tank |
||
| + | ! Название |
||
| − | ! Build Name |
||
| + | ! width="20%" |Сборка |
||
| − | ! Build |
||
| + | ! Описание |
||
| − | ! Description |
||
| − | ! Vote |
||
|- |
|- |
||
| '''[[Smasher]]''' |
| '''[[Smasher]]''' |
||
| '''''Speedy (or Anti-Troll, if you're using it against the build described above)''''' |
| '''''Speedy (or Anti-Troll, if you're using it against the build described above)''''' |
||
| '''3, 10, 10, 10''' |
| '''3, 10, 10, 10''' |
||
| − | | This build is similar to Ram, Run, Recover except with 4 major changes:<br />Cons: Can't turn invisible (meaning regenerating HP is harder), EXTREMELY low health regen (meaning it can only take on one target at a time, making this build very bad for [[2 Teams]] and [[4 Teams]]).<br />Pros: Faster than Ram, Run, Recover, can smash into every other tank in the game, kill them and survive when engaged with full HP (INCLUDING Troll build Landmines) except for other Speedy/Anti-Troll Smashers.<br />Overall: After the Landmine nerf, this build becomes better than all 3 of the builds above in 1v1 combat. After killing an enemy, you MUST use your speed to stay away from bullet spammers and other Smashers/Landmines. Major threats to Landmines like Overlords, Fighters and Boosters become just another tank, while teamers become a MUCH bigger threat than normal. Use with caution.<br />'''Note : '''You can upgrade to [[Landmine]] if you want to. |
||
| − | | <poll> |
||
| − | Is Speedy (or Anti-Troll, if you're using it against the build described above) a good build? |
||
| − | Yes |
||
| − | No |
||
| − | </poll> |
||
|- |
|- |
||
| '''[[Smasher]]''' |
| '''[[Smasher]]''' |
||
| '''Balanced Power''' |
| '''Balanced Power''' |
||
| '''8, 8, 8, 8 (+1 Stats Point)''' |
| '''8, 8, 8, 8 (+1 Stats Point)''' |
||
| − | | This build is totally balanced on offense and defense. it has all-round stats which can make this build handy in any situation. You can add 1 more point to any [[stats]] to determine which your build will be.<br />Overall : This build can handle any situation and can easily kill most enemy (in the best condition). Also 1 more stats point can help you in some sticky situation. |
||
| − | | <poll> |
||
| − | Is Balanced Power a good build? |
||
| − | Yes |
||
| − | No |
||
| − | </poll> |
||
|} |
|} |
||
| + | [[File:Landmine-1.png|left|thumb|35x35px]] |
||
=== [[Landmine]] === |
=== [[Landmine]] === |
||
| − | {| class="wikitable |
+ | {| class="wikitable mw-collapsible mw-collapsed" style="width: 100%" |
|- |
|- |
||
| + | ! Танк |
||
| − | ! Tank |
||
| + | ! Название |
||
| − | ! Build Name |
||
| + | ! width="20%" |Сборка |
||
| − | ! Build |
||
| + | ! Описание |
||
| − | ! Description |
||
| − | ! Vote |
||
|- |
|- |
||
| '''[[Landmine]]''' |
| '''[[Landmine]]''' |
||
| '''''Ram, Run, Recover''''' |
| '''''Ram, Run, Recover''''' |
||
| '''7, 8, 8, 10''' |
| '''7, 8, 8, 10''' |
||
| − | | This build is for people who don't want to be caught by other Smasher-class tanks as with the max speed you can chase tanks down or retreat. The body damage needs a point because other body damage tanks could track you down and ram. Max HP helps with that too.<br />'''Strategy'''<br />If your team is controlling the middle, become invisible near the enemy's base then wait for players to come towards you and BAM! That's another tank down.<br />However, if the enemy team is controlling the middle, stay near your base and whenever someone comes close, ram into them and retreat to base again.<br />'''Warning'''<br />Don't try to take on other Smashers as they can take you down fast. Groups of bullet spammers can be a threat too. Avoid them at all times. |
||
| − | | <poll> |
||
| − | Is Ram, Run, Recover a good build? |
||
| − | Yes |
||
| − | No |
||
| − | </poll> |
||
|- |
|- |
||
| '''[[Landmine]]''' |
| '''[[Landmine]]''' |
||
| − | | '''''Invisible Wall''''' |
+ | | '''''Invisible Wall (рус. Невидимая стена)''''' |
| + | | [[File:Прокачка "Невидимая стена".png|thumb|220x220px]]'''10, 9, 7, 7''' |
||
| − | | '''10, 9, 7, 7''' |
||
| − | | This build is focused on defense and sneak attacks since this build has really high [[Stats|Regeneration]] and [[Stats|Max Health]]. It's very good at taking a lot of bullets, and it will recover much faster than other tanks do.<br />'''Notes :''' After the nerf for invisibility, sneak attacks will be much more difficult to execute which result you will be totally rely on your defense. |
||
| − | | <poll> |
||
| − | Is Invisible Wall a good build? |
||
| − | Yes |
||
| − | No |
||
| − | </poll> |
||
|- |
|- |
||
| '''[[Landmine]]''' |
| '''[[Landmine]]''' |
||
| − | | '''''Troll''''' |
+ | | '''''Troll (рус. Троль)''''' |
| '''5, 10, 10, 8''' |
| '''5, 10, 10, 8''' |
||
| − | | This build is similar to the Invisible Wall, but the Body Damage and Max Health are maxed out, allowing you to kill even other Smashers.<br />'''Warning'''<br />Even when you have Max Health, getting hit will slow you down, so you cannot really chase people. You have to rely on your ability to become invisible. |
||
| − | | <poll> |
||
| − | Is Troll a good build? |
||
| − | Yes |
||
| − | No |
||
| − | TROLOLOLOLOLOLOLOL |
||
| − | </poll> |
||
|- |
|- |
||
|'''[[Landmine]]''' |
|'''[[Landmine]]''' |
||
|'''''Chaser''''' |
|'''''Chaser''''' |
||
|'''5,7,10,10''' |
|'''5,7,10,10''' |
||
| − | |The goal of the chaser is to easily catch tanks. The high speed and body damage allows you to catch tanks using invisibility to get close to a confused opponent. The mid-level regen and max health make this a better revenge and 1v1 tank. |
||
| − | '''Strategy''' |
||
| − | |||
| − | Stay near the center or an enemy base, and hide, when an someone comes by, make sure they are preoccupied (by other tank or alpha pentagon) while they are distracted, attack them. This works best in [[2 Teams]]. |
||
| − | | <poll> |
||
| − | Is Chaser a good build? |
||
| − | Yes |
||
| − | No |
||
| − | </poll> |
||
|} |
|} |
||
| + | [[File:Auto Smasher-0.png|left|thumb|35x35px]] |
||
=== [[Auto Smasher]] === |
=== [[Auto Smasher]] === |
||
| − | {| class="wikitable |
+ | {| class="wikitable mw-collapsible mw-collapsed" style="width: 100%" |
|- |
|- |
||
| + | ! Танк |
||
| − | ! Tank |
||
| + | ! Название |
||
| − | ! Build Name |
||
| + | ! width="20%" |Сборка |
||
| − | ! Build |
||
| + | ! Описание |
||
| − | ! Description |
||
| − | ! Vote |
||
|- |
|- |
||
| '''[[Auto Smasher]]''' |
| '''[[Auto Smasher]]''' |
||
| − | | '''''Compass''''' |
+ | | '''''Compass (рус. Компас)''''' |
| '''5, 9, 10, 9''' |
| '''5, 9, 10, 9''' |
||
| − | | ~UNTESTED BUILD, USE WITH CAUTION~ |
||
| − | A basic Smasher build. Use your auto turret to locate enemies out of your FOV and to ran into them. |
||
| − | |||
| − | WARNING: An Auto Turret will only be able to point at one enemy at a time, so always be cautious. Also, it is not always reliable, as it may be just pointing at a Polygon. |
||
| − | |||
| − | ''- Replacement for Armoured Spammer(which didn't work properly)'' |
||
| − | |||
| − | ''By II Finale II'' |
||
| − | | <poll> |
||
| − | Is Compass a good build? |
||
| − | Yes |
||
| − | No |
||
| − | Point Me! |
||
| − | </poll> |
||
|} |
|} |
||
| + | [[File:Spike-1.png|left|thumb|35x35px]] |
||
| + | |||
===[[Spike]]=== |
===[[Spike]]=== |
||
| − | {| class="wikitable |
+ | {| class="wikitable mw-collapsible mw-collapsed" style="width: 100%" |
|- |
|- |
||
| + | ! Танк |
||
| − | ! Tank |
||
| + | ! Название |
||
| − | ! Build Name |
||
| + | ! width="20%" |Сборка |
||
| − | ! Build |
||
| + | ! Описание |
||
| − | ! Description |
||
| + | |- |
||
| − | ! Vote |
||
| + | |[[Spike]] |
||
| + | |'''броня для команды''' |
||
| + | |'''10,10,10,3''' |
||
| + | ! |
||
|- |
|- |
||
| [[Spike]] |
| [[Spike]] |
||
| − | | Killer Spike |
+ | | '''Killer Spike''' |
| '''6,10,10,7''' |
| '''6,10,10,7''' |
||
| − | | IT KILLS EVERYONE LOLOLOLOL |
||
| − | |<poll> |
||
| − | Is Killer Spike a good build? |
||
| − | Yes |
||
| − | No |
||
| − | Too pointy |
||
| − | Super Pointy! =D |
||
| − | </poll> |
||
|} |
|} |
||
==Misc. Builds== |
==Misc. Builds== |
||
| − | {| class="wikitable |
+ | {| class="wikitable mw-collapsible mw-collapsed" style="width: 100%" |
|- |
|- |
||
| + | ! Танк |
||
| − | ! Tank |
||
| + | ! Название |
||
| − | ! Build Name |
||
| + | ! width="20%" |Сборка |
||
| − | ! Build |
||
| + | ! Описание |
||
| − | ! Description |
||
| − | ! Vote |
||
|- |
|- |
||
| Any |
| Any |
||
| '''Skill Spreader''' |
| '''Skill Spreader''' |
||
| '''5,4,4,4,4,4,4,4''' |
| '''5,4,4,4,4,4,4,4''' |
||
| − | | The point is to be an all around tank. |
||
| − | | <poll> |
||
| − | Is Skill Spreader a good build? |
||
| − | Yes |
||
| − | No |
||
| − | </poll> |
||
|- |
|- |
||
| '''[[Tank]]''' |
| '''[[Tank]]''' |
||
| '''Tiny Surprise Rammer''' |
| '''Tiny Surprise Rammer''' |
||
| '''7, 7, 7, 0, 5, 0, 0, 7''' |
| '''7, 7, 7, 0, 5, 0, 0, 7''' |
||
| − | | Sometimes it could be helpful not to immediately upgrade to a higher tier tank so soon. If you stay as a tiny little [[Tank]], higher level tanks, especially tanks on the Leaderboard, will pay less attention to you which enables you to kill them easily. Better yet, use this strategy while a big tank comes along and attacks your target. They will be busy fighting the other tank while you come in and ram. The slow, mostly ineffective bullets on this build is primarily for defense against a storm of bullets that could overwhelm you. The two things to upgrade first are movement speed and body damage. After you have maxed out both body damage and movement speed, spread points between health regeneration and max heath.<br />'''Steps to achieve max score'''#Join a brand new team server. |
||
| − | #Farm levels quickly and have your team dominate the server. |
||
| − | #Farm at the Pentagon Nest while maintaining your team's dominance of the server. Make sure to always stay safe. |
||
| − | | <poll> |
||
| − | Is Tiny Surprise Rammer a good build? |
||
| − | Yes |
||
| − | No |
||
| − | </poll> |
||
|- |
|- |
||
| '''[[Tank]]''' |
| '''[[Tank]]''' |
||
| '''''Simple but Strong''''' |
| '''''Simple but Strong''''' |
||
| '''3, 3, 0, 7, 7, 7, 6, 0''' or '''3, 3, 0, 4, 7, 7, 7, 2''' |
| '''3, 3, 0, 7, 7, 7, 6, 0''' or '''3, 3, 0, 4, 7, 7, 7, 2''' |
||
| − | | A Tank for those who like to just be simple. Kind of hard to reach Level 45 but worth it. It also has the sudden advantage to be able to switch to any class instantly so you can use it for various purposes if you are getting bored with it. Stay away from anything with high Penetration and you should be fine. |
||
| − | | <poll> |
||
| − | Is Simple but Strong a good build? |
||
| − | Yes |
||
| − | No |
||
| − | Simple |
||
| − | Strong |
||
| − | </poll> |
||
|- |
|- |
||
| '''Any''' |
| '''Any''' |
||
| '''Offensive Gameplay''' |
| '''Offensive Gameplay''' |
||
| '''1, 4, 0, 7, 7, 7, 7, 0''' |
| '''1, 4, 0, 7, 7, 7, 7, 0''' |
||
| − | | This build is recommended for any tank (except for [[Trapper]]s and [[Smasher]]s, obviously, but you will get a skill point refund for anything put in bullet upgrades when using Smasher-class tanks) since you will cover your target in deadly bullets/Drones which are hard to dodge and protect yourself from a bullet hell your enemy tries to overwhelm you with. The disadvantage of this build are the zero points in movement, making it difficult to fight the [[Overseer]] branch because the Drones are much faster than you. You should also avoid any rammers when you don't play as a tank that has good knockback. Max out bullet penetration and reload first so you can protect yourself from higher level enemies; they will lose interest in fighting you when they are unable to finish off such a weak tank in 2 or less seconds. After that, use the remaining skill points to upgrade damage, health, regen and bullet speed, in that order. The one skill point in regen is needed to heal from weak attacks or touching red and yellow polygons. |
||
| − | | <poll> |
||
| − | Is Offensive Gameplay a good build? |
||
| − | Yes |
||
| − | No |
||
| − | Im from tumblr and I'm offended by the offensiveness |
||
| − | </poll> |
||
|- |
|- |
||
| '''Any''' |
| '''Any''' |
||
| '''Balanced Conqueror''' |
| '''Balanced Conqueror''' |
||
| '''5, 7, 0, 0, 7, 7, 7, 0''' |
| '''5, 7, 0, 0, 7, 7, 7, 0''' |
||
| − | | This build has very high survivability and works well with all tanks except for tanks branching from [[Sniper]]. It has max health, max bullet damage, penetration, reload and high health regen. This tank is recommended for semi-offensive gameplay. Max out your bullet stats first then work on your health. This build is guaranteed to get you over 200k points, if you play it right. |
||
| − | | <poll> |
||
| − | Is Balanced Conqueror a good build? |
||
| − | Yes |
||
| − | No |
||
| − | </poll> |
||
|- |
|- |
||
| '''Any''' |
| '''Any''' |
||
| − | | '''Challenge builds''' |
+ | | '''Challenge builds''''''Чэлленджи''' |
| '''[[Tank|Basic Tank]]: 7,1,4,7,7,0,0,7'''<br />'''[[Sniper]]: 5,7,7,7,0,5,0,2'''<br />'''[[Flank Guard]]: 6,0,1,3,0,4,7,7'''<br />'''[[Machine Gun]]: 0,7,5,0,7,7,7,0'''<br />'''[[Twin]]: 7,0,7,7,0,3,4,5''' |
| '''[[Tank|Basic Tank]]: 7,1,4,7,7,0,0,7'''<br />'''[[Sniper]]: 5,7,7,7,0,5,0,2'''<br />'''[[Flank Guard]]: 6,0,1,3,0,4,7,7'''<br />'''[[Machine Gun]]: 0,7,5,0,7,7,7,0'''<br />'''[[Twin]]: 7,0,7,7,0,3,4,5''' |
||
| − | | First thing you might be wondering is "WHERE IS THE BUILD?!?!?" well, there's too many builds to list like that. Have you ever wanted to brag about something really hard to do that you completed, and things like 1M points is too hard for you?!?!? Well, these builds are for the pro of the pro - they will let you survive if you're good at the game. For example, max health regen, max speed, max bullet speed, max bullet damage and max reload on a Auto Trapper will prove to be a hard challenge. Even 75k points would be hard! Basically, these are tanks that are really hard to use but not impossible to use. The builds listed here are just some examples. |
||
| − | | <poll> |
||
| − | Are these Challenge builds good builds? |
||
| − | Yes |
||
| − | No |
||
| − | Too challenging |
||
| − | </poll> |
||
|} |
|} |
||
| + | {{Interlang |
||
| − | |||
| + | |de = |
||
| − | {{Gameplay}} |
||
| + | |en = Builds |
||
| − | [[Категория:Билды]] |
||
| + | |es = Build |
||
| + | |fr = |
||
| + | |hu = |
||
| + | |it = |
||
| + | |ja = |
||
| + | |ko = |
||
| + | |pl = |
||
| + | |pt-br = |
||
| + | |ro = |
||
| + | |sv = |
||
| + | |tr = |
||
| + | |vi = Xây dựng |
||
| + | |zh = 構建 |
||
| + | }} |
||
| + | [[Категория:Советы]] |
||
| + | [[Категория:Незавершённые статьи]] |
||
[[Категория:Танки]] |
[[Категория:Танки]] |
||
| − | [[Категория:Скиллы]] |
||
| − | [[Категория:Сырая]] |
||
| − | [[Категория:Не готова]] |
||
Версия от 16:42, 4 августа 2019

|
| |
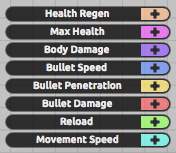
Самый распространённый вариант панели прокачки.
Ниже представлены различные типы сборок улучшений для разных танков. Они используют все 33 очка улучшения, которые можно получить после прокачки всех 45 уровней. Большая часть сборок создана под определенные танки, не перепутайте их.
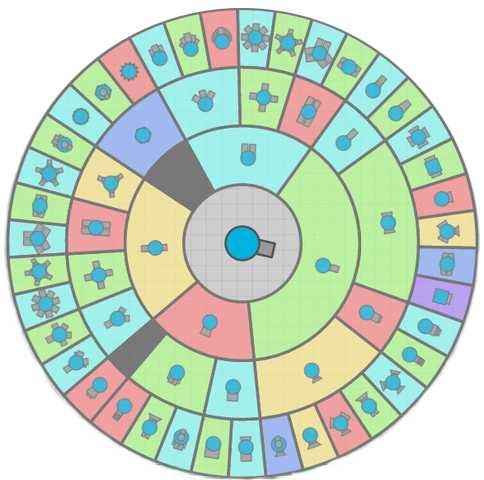
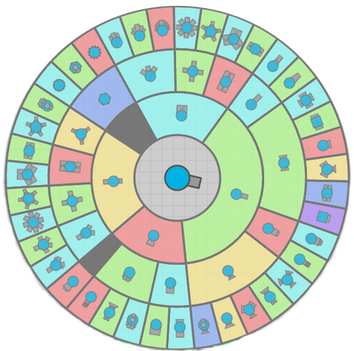
Официальное древо танков, которое можно открыть в игре нажатием на английскую клав. Y (рус. Н)


Ветка Twin'ов
| Танк | Название сборки | Сборка | Описание |
|---|---|---|---|
| Twin | Универсальная | 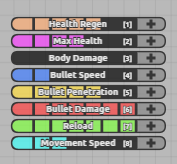 |
При таком количестве пуль их скорость не важна. Эта сборка предназначена для всех танков, которые прокачиваются с Twin'а. Так или иначе, вы так же можете игнорировать прокачку танка и оставаться на обычном Twin'e. |


Тriple Shot (не предельный ярус)
| Танк | Название сборки | Сборка | Описание |
|---|---|---|---|
| Triple Shot | Больше очков! | 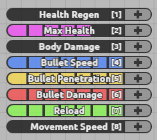 |
Эта сборка сфокусирована на наборе максимального количества очков. Упор сборки сделан на спам, благодаря которому большая часть пуль просто не долетит до вас, а если это все произойдет, ваша прокачанная регенерация быстро поставит вас на ноги. |
| Triple Shot | Ловец | 2, 0, 0, 3, 7, 7, 7, 7 | Сборка основана на поимке вражеских танков и замедлении из с помощью пуль. Отлично подходит для командной игры. Не рекомендуется атаковать дроны! |
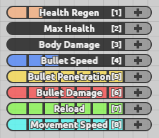


Penta Shot
| Танк | Название Сборки | Сборка | Описание |
|---|---|---|---|
| Penta Shot |
Стеклянный Кошмар |
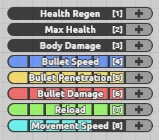 |
Сборка предназначена для игры по принципу "увидел, попал, убил." Высокий урон даст вам возможность убивать противников с нескольких выстрелов, высокая скорость - быстро уходить. Но будьте аккуратны, ведь любое неосторожное действие может привести в вашей смерти. |
| Penta Shot | Туча | 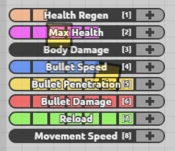 |
Этот билд использует патроны для защиты. Оптимален для игры в команде, как нападающий со спины или защитник. |
| Penta Shot | Каскадер | 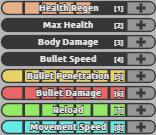 |
Полу-защитный стиль, предназначенный, в основном, для поддержки союзников вашими снарядами и защите союзников. |


Spread Shot
| Танк | Название Сборки | Сборка | Описание |
|---|---|---|---|
| Spread Shot | Максимальная Эффекстивность | 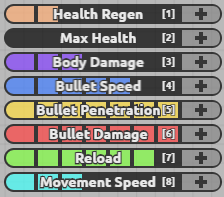 2, 0, 3, 5, 7, 7, 6, 3 2, 0, 3, 5, 7, 7, 6, 3
|
Сборка одновременно сфокусированна на атаке и выживании. Ваша способность создавать душ из пуль отлично работает как для атаки, так и для защиты. В сочетании с высоким уроном она может быть сверхэффективной. |
| Spread Shot | Вертикальная Защита | 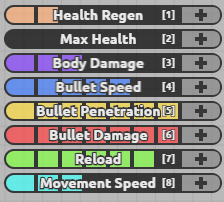 2, 0, 3, 1, 7, 7, 7, 6 2, 0, 3, 1, 7, 7, 7, 6
|
Сборка создана для защиты товарищей по команде. Хорошо использовать а паре с гибридом. Убийство игроков может вызывать сильные проблемы. |
| Spread Shot | Блокировка |  1, 0, 0, 7, 7, 7, 7, 4 1, 0, 0, 7, 7, 7, 7, 4
|
Защитная сборка, основанная на уничтожении противников рядом с вами. Благодаря высокой скорости пули, противники могут быть ранены еще на подлетах к вам. |
| Spread Shot | Мародер | 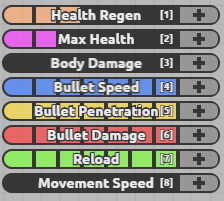 3, 2, 0, 7, 7, 7, 7, 0 3, 2, 0, 7, 7, 7, 7, 0
|
Атакующая сборка, рассчитанная на быстрое убийство. |


Triplet
| Танк | Название Сборки | Сборка | Описание | Голосование |
|---|---|---|---|---|
| Triplet | Неостановимый | 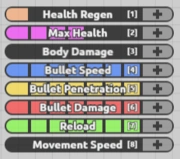 |
Атакующая сборка, не рассчитанная на затяжной бой. | |
| Triplet | Воин |
| ||
| Triplet | Стеклянный Ужас
| |||
| Triplet | Regenerative Reaper(рус. Смерть регенерации)
5/2/0/6/7/6/7/0 4/3/0/6/7/6/7/0 | |||
| Triplet | Shockwave T | 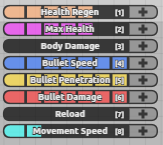 |
Атакующая сборка, которая основывается на большом количестве урона. |
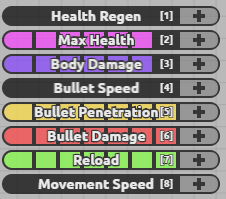
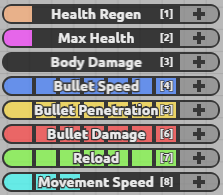
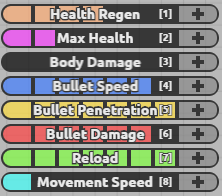


Ветка Sniper
| Танк | Название | Сборка | Описание |
|---|---|---|---|
| Sniper | Glass Sniper(рус. стеклянный снайпер) | 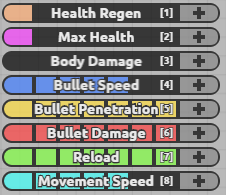 1, 1, 0, 5, 7, 7, 7, 5 1, 1, 0, 5, 7, 7, 7, 5
| |
| Sniper | Assault Rifle | 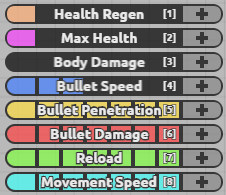 1, 1, 0, 3, 7, 7, 7, 7 1, 1, 0, 3, 7, 7, 7, 7
|


Ranger
| Танк | Название | Сборка | Описание |
|---|---|---|---|
| Ranger | Gotta Snipe 'em all! | 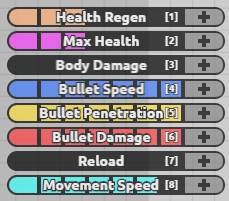 3, 3, 0, 7, 7, 7, 0, 6 3, 3, 0, 7, 7, 7, 0, 6
| |
| Ranger | Guerilla (Гарилла) |  1, 1, 0, 5, 7, 7, 5. 7 1, 1, 0, 5, 7, 7, 5. 7
| |
| Ranger | Sharpshooter | 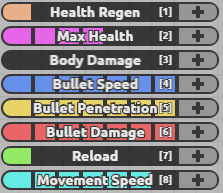 1, 4, 0, 7, 7, 7, 1, 6 1, 4, 0, 7, 7, 7, 1, 6
| |
| Ranger | You can't see me but I can see you!(рус. Ты не можешь увидеть меня но я могу увидеть тебя!) | 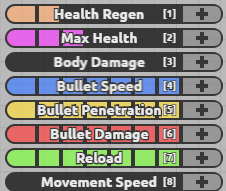 2, 3, 0, 7, 7, 7, 7, 0 2, 3, 0, 7, 7, 7, 7, 0
|


Stalker
| Танк | Название | Сборка | Описание |
|---|---|---|---|
| Stalker | Surprise Attack! | 3, 2, 0, 7, 7, 7, 7, 0 | |
| Stalker | Ghost(рус. Призрак) | 7, 7, 7, 0, 5, 0, 0, 7 | |
| Stalker | Sneaky | 7, 2, 0, 7, 7, 7, 3, 0 | |
| Stalker | Powerful | 4, 7, 5, 3, 7, 7, 0, 0 |


Predator
| Танк | Название | Сборка | Описание |
|---|---|---|---|
| Predator | One hit KO | 0, 0, 5, 6, 7, 7, 5, 3 | |
| Predator | The Real Sniper | 7, 2, 0, 7, 7, 7, 3, 0 | |
| Predator | Balanced Bolt-Action Sniper | 4, 4, 0, 7, 7, 7, 0, 4 |


Streamliner
| Танк | Название | Сборка |
|---|---|---|
| Streamliner | "GET DUNKED ON" | 0, 5, 0, 7, 7, 7, 7, 0 |
| Streamliner | "A REAL LAGGER" | 5, 7, 0, 0, 7, 7, 7, 0 |
| Streamliner | Mobile Laser (рус. Мобильный лазер) | 1, 0, 0, 7, 7, 7, 7, 4 |
| Streamliner | Xtremely Powerful (рус. Экстремально сильный) | 4, 5, 0, 6, 6, 6, 6, 0 |
| Streamliner | Avada Kedavra | 1, 0, 0, 7, 7, 7, 6, 5 |


Overlord
| Танк | Название | Сборка | Описание |
|---|---|---|---|
| Overlord | Obliterator | 6, 6, 0, 7, 7, 7, 0, 0 | |
| Overlord | Breakout | 6, 6, 0, 4, 3, 4, 3, 7 | |
| Overlord | Survivalist | 3, 4, 0, 6, 7, 7, 2, 4 | |
| Overlord | Anti-This | 0, 0, 0, 7, 7, 7, 7, 5 | |
| Overlord | Killer Tank | 2, 2, 0, 7, 7, 7, 3, 5 | |
| Overlord/Necromancer/Manager | The Best Defence [DO NOT EDIT THIS TANK WITH FALSE DETAILS D:D:D:] | Overlord: 6, 2, 0, 7, 7, 7, 4, 0 Necromancer: 4, 2, 0, 3, 7, 7, 7, 3 Manager: 1, 2, 0, 3, 7, 7, 7, 6 Adapted: 2, 2, 0, 4, 7, 7, 7, 4 | |
| Overlord | Defensive Overlord | 2, 6, 1, 7, 7, 7, 1, 2 | |
| Overlord | Craig's Overlord | 4, 4, 0, 7, 7, 7, 0, 4 | |
| Overlord | Exterminator Drones | 0,0,0,7,7,7,5,7 |


Manager
| Танк | Название | Сборка | Описание |
|---|---|---|---|
| Manager | Knight (рус. Рыцарь) | 5, 0, 0, 7, 7, 7, 0, 7 | |
| Manager | Sneak Attack | 7, 7, 7, 1, 1, 1, 2, 7 | |
| Manager | Double trouble | 7, 7, 7, 0, 5, 0, 0, 8 |


Necromancer
| Танк | Название | Сборка | Описание |
|---|---|---|---|
| Necromancer | Glass Upgrades'''(рус. Стеклянные улучшения) | 1, 1, 1, 6, 6, 6, 6, 6 | |
| Necromancer | REVENGE | 3, 4, 0, 6, 6, 6, 6, 0, (+2 extra Skill Points) | |
| Necromancer | Anokuu's Build | Basic: 0, 0, 0, 7, 7, 7, 6, 6 - Advanced: 0, 0, 0, 6, 7, 7, 7, 6 (Read Guide) | |
| Necromancer | Square Swarm | 0, 0, 0, 7, 7, 7, 7, 5 |


Battleship
| Танк | Название | Сборка | Описание |
|---|---|---|---|
| Battleship | Quality Over Quantity'''(рус. Качество вместо количества) | 0, 5, 0, 6, 7, 7, 3, 5 | |
| Battleship | Gamebreaker'''(рус. Уничтожатель игр) | 2, 2, 0, 7, 7, 7, 7, 1 |


Tri-Trapper
| Танк | Название | Сборка | Описание |
|---|---|---|---|
| Tri-Trapper | Ultimate Defense (Ультимативная защита) | 5, 7, 0, 0, 7, 7, 7, 0 |


Gunner Trapper
| Танк | Название | Сборка | Описание |
|---|---|---|---|
| Gunner Trapper | Powerful | 7, 2, 0, 7, 7, 7, 0, 3 | |
| Gunner Trapper | Fighter | 1, 0, 0, 7, 7, 7, 7, 3 |


Mega Trapper
| Танк | Название | Сборка | Описание |
|---|---|---|---|
| Mega Trapper | Great Wall of China | 4, 1, 0, 7, 7, 7, 7, 0 |


Auto Trapper
| Танк | Название | Сборка | Описание |
|---|---|---|---|
| Auto Trapper | Wall Turret |
1, 1, 0, 3, 7, 7, 7, 7 (More Defense) 0, 0, 0, 6, 7, 7, 7, 6 (More Attack) |


Overtrapper
| Танк | Название | Сборка | Описание |
|---|---|---|---|
| Overtrapper | 'standart'defense ('Стандартная'Защита) | 0, 4, 0, 6, 6, 6, 7, 4. |


Ветка Machine Gun
| Танк | Название | Сборка | Описание |
|---|---|---|---|
| Machine Gun | Gold Nugget (рус. Кусочек золота) | 7, 7, 0, 0, 6, 6, 7, 0 |


Destroyer (не предельный ярус)
| Танк | Название | Сборка | Описание |
|---|---|---|---|
| Destroyer / Annihilator / Hybrid | Jelly Fish | 7, 7, 7, 0, 0, 0, 5, 7 | |
| Destroyer | Wrecking Ball | 2, 3, 0, 4, 7, 7, 7, 3 | |
| Destroyer | Weird build! | 7, 7, 7, 7, 5, 0, 0, 0 | |
| Destroyer | Beefy, Speedy, and "Deadly" | 7, 7, 7, 0, 0, 5, 0, 7 |


Hybrid
| Танк | Название | Сборка | Описание |
|---|---|---|---|
| Hybrid | Rammer | 6,6,6,0,2,0,6,6 | |
| Hybrid | Skill Spreader | 5,4,4,4,4,4,4,4 | |
| Hybrid | Deceptive Destruction | 3, 7, 7, 1, 0, 4, 4, 7 | |
| Hybrid | Middle Roman Conqueror | 3, 5, 1, 6, 7, 7, 2, 2 | |
| Hybrid | Wrecker | 7, 7, 0, 0, 5, 7, 7, 0 | |
| Hybrid | The Real HYbrid | 0, 5, 5, 4, 6, 6, 7, 0 | |
| Hybrid | "Man o' War" | 1, 4, 2, 7, 6, 7, 6, 0 | |
| Hybrid | "Bullet Rammy" | 5, 0, 7, 7, 0, 0, 7, 7 | |
| Hybrid | "AntiRed" | 0, 0, 0, 7, 7, 7, 7, 5 | |
| Hybrid | "Increased Bullet Supply" | 4, 4, 0, 7, 5, 6, 7, 0 (You may trade some HP upgrades for speed) | |
| Hybrid | Confusing the Boosters | 0, 7, 7, 0, 6, 6, 0, 7 | |
| Hybrid | Lagbreaker's build | 3, 0, 0, 7, 6, 6, 4, 7 |


Annihilator
| Танк | Название | Сборка | Описание |
|---|---|---|---|
| Annihilator | Rammer | 5, 7, 7, 0, 0, 0, 7, 7 | |
| Annihilator | The Magic Shot | 4, 4, 0, 7, 7, 7, 4, 0 | |
| Annihilator | Silent Murderer | 1, 5, 0. 7, 7, 7, 6, 0 | |
| Annihilator | Blitz3r | 6, 6, 0, 7, 7, 7, 0, 0 |


Gunner (не предельный ярус)
| Танк | Название | Сборка | Описание |
|---|---|---|---|
| Gunner | Weakling | 3, 3, 0, 7, 7, 6, 7, 0 | |
| Gunner | Unnamed (рус. Не названный) | 2, 5, 0, 1(or 2), 7, 7, 7, 7 |


Sprayer
| Танк | Название | Сборка | Описание |
|---|---|---|---|
| Sprayer | Slow But Powerful (рус. Медленный но сильный) | 7, 5, 0, 0, 7, 7, 7, 0 | |
| Sprayer | Fragile Bullet Spammer | 3, 2, 0, 7, 7, 7, 7, 0 | |
| Sprayer | Impenetrable | 7, 2, 0, 3, 7, 7, 7, 0 |


Auto Gunner
| Танк | Название | Сборка | Описание |
|---|---|---|---|
| Auto Gunner | Tracker | 0, 0, 0, 7, 7, 7, 6, 6 |


Ветка Flank Guard
| Танк | Название | Сборка | Описание |
|---|---|---|---|
| Flank Guard | N/A | 7, 2, 0, 6, 6, 6, 6, 0 |


Tri-Angle (не предельный ярус)
| Танк | Название | Сборка | Описание |
|---|---|---|---|
| Tri-angle | Speedy
Rammer |
7,7,7,0,0,0,0,7 | |
| For All Tri-Angle Upgrades | Balanced-Offensive | 3, 0, 3, 3, 7, 7, 7, 3 | |
| Tri-Angle | Fast and Furious | 4, 4, 0, 4, 7, 7, 7, 0 | |
| Tri-Angle | Demon god | 2, 4, 7, 7, 1, 0, 7, 5 |


Auto 5
| Танк | Название | Сборка | Описание |
|---|---|---|---|
| Auto 5 | Pressured Lockdown! | 0, 6, 1, 7, 7, 7, 2, 3 | |
| Auto 5 | Auto Turret (рус. Авто турель) | 2, 2, 0, 7, 7, 7, 7, 1 | |
| Auto 5 | TOUHOU DODGING SKILLZ FTW | 0, 0, 0, 5, 7, 7, 7, 7 |


Booster
| Танк | Название | Сборка | Описание |
|---|---|---|---|
| Booster | Speedy (рус.Быстрый) | 2, 2, 0, 4, 4, 7, 7, 7 | |
| Booster | Fastest Tank Alive | 0, 0, 0, 7, 6, 6, 7, 7 | |
| Booster | Speed Ram | 5, 7, 7, 0, 0, 0, 7, 7 | |
| Booster | Boosted Ramming | 7, 7, 7, 0, 0, 0, 5, 7 | |
| Booster | Hit n' Run | 5, 7, 0, 0, 7, 7, 7, 0 | |
| Booster | Master of Deception | 2, 4, 7, 0, 6, 7, 7, 0 or 2, 3, 7, 0, 7, 7, 7, 0 | |
| Booster | All in with it | 0, 0, 0, 5, 7, 7, 7, 7 | |
| Booster | Tanky Lightning | 7, 7, 5, 0, 0, 0, 7, 7 | |
| Booster | Invincible Hulk | 2, 7, 0, 0, 6, 6, 7, 5 | |
| Booster/Fighter | Hit and Run (рус.Ударь и беги) | 3, 2, 0, 4, 5, 5, 7, 7 | |
| Booster | The Armored Bugatti (TAB) | 7, 6, 7, 0, 0, 0, 6, 7 | |
| Booster | Careful / Bullet Shield | 4, 3, 0, 2, 7, 2, 7, 4 (+4) | |
| Booster | Wall Buster | 0, 7, 7, 0, 5, 7, 7, 0 |


Fighter
| Танк | Название | Сборка | Описание |
|---|---|---|---|
| Fighter | Ram Brawler | 7, 7, 7, 0, 0, 0, 5, 7 | |
| Octotank | Noob Hunter | 7, 7, 7,0, 0,0, 7 | |
| Fighter | The True Fighter | 7, 7, 0, 5, 5, 5, 2, 2 | |
| Fighter | The Killer Tank! | 2, 2, 0, 5, 7, 7, 7, 3 | |
| Fighter | Head-on Attack | 6, 0, 0, 0, 7, 7, 7, 6 | |
| Fighter | The Hero (рус. Герой) | 3,3,7,0,5,5,7,3 | |
| Rammer Killer | 0, 0, 0, 7, 7, 6, 7. 6 |


Octo Tank
| Танк | Название | Сборка | Описание |
|---|---|---|---|
| Octo Tank | Champion (рус. Чемпион) | 7, 7, 0, 0, 7, 5, 7, 0 | |
| Octo Tank | Unstoppable Satisfaction | 2, 6, 0, 7, 6, 6, 5, 1 | |
| Octo Tank | Somewhat Glass tank | 0, 5, 0, 6, 5, 6, 6, 5 | |
| Octo Tank | Hurricane | 5, 0, 0, 3, 7, 7, 4, 7 | |
| Octo Tank | Human Made Storm | 3, 3, 0, 7, 6, 7, 7, 0 | |
| Octo Tank | Grind & Run | 2, 1, 0, 2, 7, 7, 7, 7 | |
| Octo Tank | Noob Killer (Убийца Нубов) | 3, 7, 7, 0, 6, 6, 5, 0 | |
| Octo Tank | Anti-Ramming Bullet Spamming | 5, 7, 0, 0, 7, 7, 7, 0 |


Ветка Smasher
| Танк | Название | Сборка | Описание |
|---|---|---|---|
| Smasher | Speedy (or Anti-Troll, if you're using it against the build described above) | 3, 10, 10, 10 | |
| Smasher | Balanced Power | 8, 8, 8, 8 (+1 Stats Point) |


Landmine
| Танк | Название | Сборка | Описание |
|---|---|---|---|
| Landmine | Ram, Run, Recover | 7, 8, 8, 10 | |
| Landmine | Invisible Wall (рус. Невидимая стена) |   | |
| Landmine | Troll (рус. Троль) | 5, 10, 10, 8 | |
| Landmine | Chaser | 5,7,10,10 |


Auto Smasher
| Танк | Название | Сборка | Описание |
|---|---|---|---|
| Auto Smasher | Compass (рус. Компас) | 5, 9, 10, 9 |


Spike
| Танк | Название | Сборка | Описание |
|---|---|---|---|
| Spike | броня для команды | 10,10,10,3 | |
| Spike | Killer Spike | 6,10,10,7 |
Misc. Builds
| Танк | Название | Сборка | Описание |
|---|---|---|---|
| Any | Skill Spreader | 5,4,4,4,4,4,4,4 | |
| Tank | Tiny Surprise Rammer | 7, 7, 7, 0, 5, 0, 0, 7 | |
| Tank | Simple but Strong | 3, 3, 0, 7, 7, 7, 6, 0 or 3, 3, 0, 4, 7, 7, 7, 2 | |
| Any | Offensive Gameplay | 1, 4, 0, 7, 7, 7, 7, 0 | |
| Any | Balanced Conqueror | 5, 7, 0, 0, 7, 7, 7, 0 | |
| Any | 'Challenge builds'Чэлленджи | Basic Tank: 7,1,4,7,7,0,0,7 Sniper: 5,7,7,7,0,5,0,2 Flank Guard: 6,0,1,3,0,4,7,7 Machine Gun: 0,7,5,0,7,7,7,0 Twin: 7,0,7,7,0,3,4,5 |