Builds modificirati statistiku igrača u igri. Zdravlje, brzina i snaga metaka (među ostalima) mogu se ojačati ulaganjem bočne vještine u odgovarajuće statistike, što znači da će vam dati bolje šanse za preživljavanje.
Types of Builds
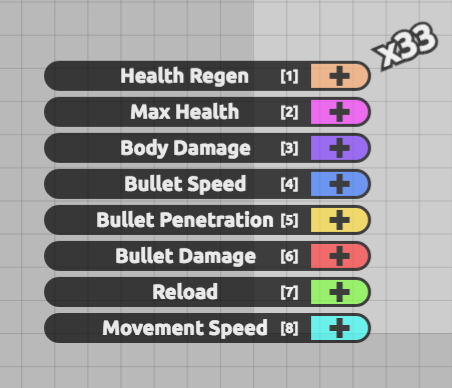
Choose the skills you upgrade wisely.
There are a grand total of 40,820,633 different builds available. However, building on the tank’s strengths and weaknesses is important as jacks of all trades aren’t nearly as useful. That is to say — depending on the class, the most useful builds will usually fall under one of the following categories:
Glass Cannons
Characteristics: Moderately low burst damage or momentum, very high regeneration or DPS and large range.
Glass cannons are builds that sacrifice health in favor of the 0/0/0/X/X/X/X/X side of their stats. They are generally fast, very strong builds with decent range, but usually die in 1 or 2 hits if unprotected by their own ammo.
Rammers
Characteristics: Very high burst damage or momentum, moderate regeneration or DPS and low range.
The opposite of Glass Cannons, they focus on the X/X/X/0/0/0/X/X side of their table and may also use reload to propel themselves. Tanks using these builds can withstand incredible amounts of enemy fire before dying, making them incredibly survivable. Offensively they are usually held back by the knockback they receive upon collision with bullets. Additionally, health regen can’t really keep up with enemy Bullet DPS, thus they usually depend on ambushes or teaming in order to kill most users.
Bullet Rammers
Characteristics: Moderately high burst damage or momentum, moderately high regeneration or DPS and low range.
These are tanks that sacrifice Bullet Speed and sometimes Movement Speed in favor of moderate amounts of Health and maxed out Bullet Stats, focusing on 0/X/X/0/7/7/7/X stats-wise. They are characterized by the “walls” or “clouds” they create when moving forward (due to their bullets getting grouped together), walls which they can then use to ambush and ‘ram’ other players.
Depending on the classes’ overall Speed, they may be considered counters to Rammer build users; as their combined momentum (ammo & body) is often enough to ‘outram’ them. However, it should be noted that - as Bullets only move in one direction, these ‘walls’ they create are part of their momentum and can be lost - forcing them to constantly regenerate, as the target can move out of the Bullets’ trajectory or the Bullets de-spawn very quickly, forcing them to re-aim and/or start the walls from scratch.
Build pool
The following are Builds for different Classes, made by players using the 33 skill points available upon reaching level 45. When using a build, make sure to choose the tank upgrades correctly.
AND PLEASE NOTE: that the builds on this page differ in quality. And that as everyone plays the game differently, not all builds will work as well for every user. Use this page as a reference for how practical each build has been deemed by the diep.io community. Be sure to vote in the polls for any builds you test out so that future visitors know which builds are most useful in general! This page is designed to give readers a basis from which they can begin to form their own style of play and so that they may discover their own perfect build, but it makes no pretense as to which builds are the best.
With this in mind, feel free to start browsing!
Note: In the window that pops up at first, please scroll down and select “Data”. Please allow up to a week for your build to be reviewed before it is added to the page.
This build works out at Level 45, it could out penetrate or overwhelm almost any tank in Maze mode, including Destroyer classes and close up Assassin or Hunter branch tanks. Just watch out for Auto 5s or Auto Gunners with high bullet speed, skilled Overlords and other tanks using the same drones, and sometimes Trapper classes, especially Auto Trappers (though Trapper classes can't be a problem at times due to the slow bullet speed, and the fact that your bullets may push the traps away and hit the opponent, so for most of the time, you will be fine, just avoid Auto Trappers).
Master Spark
Build
0 / 0 / 0 / 7 / 6 / 6 / 7 / 7
Fine Build
Build
0 / 0 / 0 / 2 / 7 / 6 / 4 / 2
Basic Bullet
Build
4 / 4 / 0 / 4 / 7 / 7 / 7 / 0
Description
It works for most upgrades of the twin. One point from Health regen to max health
Bullet Ram
Build
2 / 2 / 1 / 0 / 7 / 7 / 7 / 7
Description
Trades Bullet speed for movement speed, and in turn creates a bullet wall in front of the tank. Bullets move slightly faster than the tank, so they collect in a mass in front. Mainly a Defense build, as chasing opponents is hard without bullet speed. Great in Maze; It can act as a shield when going down long corridors and can create a hard to bypass wall when hiding behind a corner. Great against rammers, allowing you to escape with ease if your not cornered. Even when you are it is almost impossible for a rammer to reach your tank if you face directly at them. Not the best against Glass builds though, so watch out for that. It's also great against bullet spammers like gunners and sprayers. It has some trouble dealing with strong drones, so don't get cornered unless you can out maneuver them. Snipers aren't much of a problem if you know where they are, but an ambush can definitely cause problems. Not the best against destroyers, but can get you away in a pinch. Not the best against balanced triplets and twins, though it can still be a pretty even match. The health and regen is pretty fluid; you can change it to whatever you prefer and get similar results.
Made by Redostonecraft, this provides a balanced build for Octo Tanks with emphasis on survivability.
The Hurricane
Build
0 / 5 / 0 / 1 / 7 / 7 / 6 / 7
Bullet Storm
Build
2 / 0 / 0 / 7 / 7 / 7 / 7 / 3
Octo Hurricane
Build
2 / 3 / 0 / 0 / 7 / 7 / 7 / 7
Dangerous Thunderstorm
Build
3 / 3 / 0 / 6 / 7 / 6 / 6 / 2
Glass Octo
Build
0 / 0 / 0 / 6 / 7 / 7 / 7 / 6
Hurricane Justin
Build
0 / 5 / 3 / 1 / 6 / 6 / 7 / 5
Description
A hurricane-style build that my friend Justin uses. Customizable, switch high bullet damage and penetration for max health and body damage for an anti-rammer that would surprise Boosters and Smashers, or put more points into penetration and damage for a glass fortress that will keep enemies out and provide nice crowd control in Teams or Domination.
Blizzard
Build
0 / 0 / 5 / 0 / 7 / 7 / 7 / 7
Somewhat Glass Tank
Build
0 / 5 / 0 / 6 / 5 / 6 / 6 / 5
Hurricane
Build
5 / 0 / 0 / 3 / 7 / 7 / 4 / 7
The Tropical Storm
Build
1 / 4 / 0 / 7 / 7 / 7 / 7 / 0
OctoTrool
Build
0 / 0 / 0 / 5 / 7 / 7 / 7 / 7
FLARE´s octo tank
Build
1 / 3 / 0 / 1 / 7 / 7 / 7 / 7
Description
if you want you can swap the health and bullet speed points around. designed for chasing down smaller tanks and creates cover in TDM modes for other players
Octo Farmer
Build
0 / 2 / 0 / 7 / 4 / 7 / 7 / 6
Description
A (glassy) build suitable for peaceful farming of points, especially near the Pentagon Nest. Caution that confrontations are to be avoided. Suitable for use in modes with a base/safety zone, where one can flee to upon danger. Not recommended for modes where fighting against other tanks are unavoidable.
Rammer Hell
Build
0 / 6 / 5 / 3 / 6 / 6 / 6 / 1
Description
I recommend that you have one other teammate in your range if you are on 4-team, 2-team, or any other team mode, because this build doesn't guarantee protection, like everything else. If you are in any other mode though, try working up your skill for this build by battling with lvl 20-30 tanks, because this build is, again, a little hard to manage.
The Wall
Build
6 / 6 / 0 / 0 / 7 / 7 / 7 / 0
Description
Not very offensive, but keeps you and your teammates safe(ish)
Good Spread Shot build for attacking and winning quickly (as the name implies). Works best for 2 Teams, though it can still work well in 4 Teams if you make sure to team up with someone. When using this build, focus on one target at a time and make good use of guerilla tactics (e.g., sneak attacks and quick rushes). If your health goes below one third, get to safety and regen. Optionally, you can take the one point in regen and put it in bullet speed instead. though this is only recommended if you have some bullet spammers who can shield you. With the right technique, you'll be able to take on most tanks in the game. Using this build in 2 Teams, I can often get a score over 200k.
Max Efficiency
Build
2 / 0 / 3 / 5 / 7 / 7 / 6 / 3
Offensive Shield
Build
5 / 4 / 0 / 1 / 7 / 7 / 7 / 2
Grapeshot
Build
0 / 2 / 3 / 0 / 7 / 7 / 7 / 7
Glass Endeka
Build
0 / 0 / 0 / 5 / 7 / 7 / 7 / 7
Dangerous Thunderstorm: The Storm for the Midnight Moon
Pretty good against Fallen Booster and for surviving
Turret
Build
1 / 2 / 3 / 7 / 7 / 6 / 7 / 0
Description
The turret focuses on attacking enemies and is more of a quick defence tank. It focuses on its bullets stats.
Well Rounded
Build
4 / 4 / 4 / 4 / 4 / 4 / 4 / 4
Description
Well Rounded works well in FFA and Maze, due to it having decent health,
regen, strength, and speed all at once. The last 33rd upgrade is of your choosing.
Commonly used by Πρmaniac in Domination mode. Works well alongside offensive Skimmer and Penta Shot builds. Max speed is used for evading the bullets of Destroyer and Gunner Dominators, as well as weaving in-between masses of bullets and outplaying Smasher-branch tanks that would normally spell death for the Streamliner.
Get Dunked On
Build
0 / 5 / 0 / 7 / 7 / 7 / 7 / 0
Gatling Gun
Build
1 / 3 / 0 / 5 / 7 / 6 / 6 / 5
Description
A build for taking down the Fallen Booster, use your movement speed to move faster than the boss and fire high damage bullets at it. You trade one point from reload and bullet damage and two points from bullet speed for health stats to have better armor in case you get damaged during the fight. This build is not just for killing the Fallen Booster, you may also stand a chance against the Guardian if you are skilled enough. Be careful when moving forward as that will slow down your bullet speed.
A great all-round overseer. Stay away from Bullet Slammers and Bullet Spammers. - TekkerGods
Sith Emperor
Build
0 / 5 / 0 / 7 / 7 / 7 / 2 / 5
Description
Hunt down your opponents with this tank and kill them. Kill them now. Dew it.
Speed Leveler
Build
1 / 5 / 0 / 7 / 7 / 6 / 2 / 5
Description
Great for leveling. Grab 1 point of damage, max speed, max penetration then bullet speed. Grab 1 level in regen, finish off damage then dump the rest into health.
The Mill
Build
3 / 1 / 1 / 7 / 7 / 7 / 0 / 7
Description
I have gotten three 1,000,000+ scores with this build!
Best build according to overlord
Build
1 / 1 / 0 / 7 / 7 / 7 / 7 / 3
Description
Since overlords depends all on its drones, you can use this build to make the drones have the full capability to both attack and defend yourself. You must add at least 3 skill points for movement speed for both farming and escaping/dodging fast rammers. Hope you will like and enjoy my build!!!
Rammers will fear u
Build
5 / 7 / 0 / 7 / 7 / 7 / 0 / 0
Description
It's good to destroy a maxed rammer booster, and its good to rid you of battleships
Speed and Power Overlord
Build
5 / 0 / 0 / 7 / 7 / 7 / 0 / 7
Description
Speed is essential. So is power. But we want to kill as many tanks in a short time as possible, so health regen is important.
The Ripper
Build
2 / 3 / 0 / 7 / 7 / 7 / 0 / 7
Description
Just my personal build. I use this one a lot. What'd ya think?
Super Anti-Rammers
Build
0 / 4 / 5 / 6 / 6 / 6 / 0 / 6
Description
This Build Is like anti-Rammers but you sacrifice a few points on Speed, Penetration, Damage, Max Health and body Damage for six points on movement speed. But please, Try it before you judge it.
Troll Lord
Build
2 / 7 / 7 / 7 / 5 / 5 / 0 / 0
Description
This thing is crazy! When rammers try to ram you, use your drones to lower its health then go broke for it, if it's glass cannon you're facing, ram them or do the same process
This build is designed for TDM, as you can troll by sending your drones out purposely too far, to bait somewhat low health rammers in, and ram them. However, another idea is to max out health and body damage, but bullet speed/damage is 6.
Ursuul’s preferred Necromancer Build. It allows for sufficient offensive maneuverability as well as having extra points left over for comfortable health padding.
Anooku’s Improved Build
Build
0 / 0 / 0 / 7 / 7 / 7 / 5 / 7
Square Swarm
Build
0 / 0 / 0 / 7 / 7 / 7 / 7 / 5
Revenge
Build
3 / 4 / 0 / 6 / 6 / 6 / 6 / 0
Description
3/4/0/6/6/6/6/0 (+2 left over)
Anooku’s Build
Build
0 / 0 / 0 / 6 / 7 / 7 / 7 / 6
Fragile but Untouchable
Build
0 / 0 / 0 / 7 / 7 / 7 / 5 / 7
Evil Entity
Build
0 / 3 / 0 / 7 / 7 / 7 / 6 / 3
Anooku’s Balanced Build
Build
0 / 0 / 0 / 7 / 7 / 7 / 6 / 6
Description
A very good overall build that balances Movement Speed and Reload. Despite the lack of Max Health and Health Regen, it allows you to chase prey as well as run away from dangerous tanks due to the movement speed. This build also comes with 34 solid drones, which is more than most Necromancers have. Very useful for offense, and with so many drones, also has decent defense.
With Bullet Penetration and Bullet damage, you one-shot level 45 tanks with 7 points in health. Having 5 body damage halves damage done to you by bullets and allows you to use you recoil to ram others. This build is a representation of its name Hybrid; You can shoot and you can ram. It is recommended to flee when you are low on health due to this tank's lack of health regen.
Penta Hunter
Build
0 / 3 / 2 / 7 / 7 / 7 / 0 / 7
Description
This is a build to kill the Penta Shot. Note: You could also fight other bullet spammers with this build.
Difficult but powerful
Build
0 / 0 / 0 / 7 / 7 / 7 / 5 / 7
Glass 0800
Build
2 / 0 / 0 / 6 / 7 / 6 / 6 / 6
Middle Roman Conqueror
Build
3 / 5 / 1 / 6 / 7 / 7 / 2 / 2
0800 Hybrid
Build
3 / 2 / 0 / 6 / 7 / 7 / 4 / 4
Anti-Rammer Tank
Build
0 / 6 / 7 / 7 / 7 / 6 / 0 / 0
Description
Use build 0/6/7/5/7/6/2/0 if you want more reload.
AntiRed
Build
0 / 0 / 0 / 7 / 7 / 7 / 7 / 5
Confusing the Boosters
Build
0 / 7 / 7 / 0 / 6 / 6 / 0 / 7
Lagbreaker’s build
Build
3 / 0 / 0 / 7 / 6 / 6 / 4 / 7
EASY KILL
Build
0 / 3 / 4 / 7 / 7 / 6 / 5 / 1
Lightning Bruiser
Build
1 / 7 / 7 / 4 / 7 / 7 / 0 / 0
Description
Able to do everything. Tanky, offensive, rammer, and speedy with its recoil
The build allows you to track your enemies down (the Auto Turret shows tanks that are off-screen) and kill them easily. As a Gunner, it still has its weakness: low penetration. That’s why you should avoid the Twin branch (except if they are low on health). Surprisingly, you can out-trade Destroyers and Hybrids, both the bullet damage ones and the rammer ones. Other tank types should be no problem because of your speed and bullet rain. It’s recommend to stay with Machine Gun until level 45 but you can go Gunner at level 30. Useful in all game modes but best in FFA.
Max reload affects rocket bullet output, so you won't need bullet speed with max reload! Spam those rockets like mad and destroy those forsaken spammers once and for all. An absolute beast in 2 Teams and Domination, but the Overlord will shut you down every single time.
Machine Gun upgrade excellent for farming, upgrade to Destroyer situationally (for mobility, anti-rammer, offense, attack Dominators, Alpha Pentagon) because terrible for farming. upgrade to Rocketeer ASAP.
Suggested stat point upgrading: [6]x3, [5]x4, [7]x7, [8]x5, [2]x2, [6]x2, [5]x1, [1]x2, [2]x1, [1]x2, [3]x1.
Weakness: overwhelm, drones, and dodgy tanks.
Update: Removed some Move Speed in favor of Regen, because being robust favored over dodging. Relocated one point from Max HP to Body Dam for damage reduction; very effective with higher Regen stat.
Poppy’s Build
Build
0 / 0 / 0 / 5 / 7 / 7 / 7 / 7
Description
This is a build that targets Overseer, Trapper and Triple Shot upgrades. To counter the innate weakness against rammers, movement speed is maxed. I advise you to use it in team-oriented modes. Stay away from Rangers and Predators.
Jackal's 1 Mil Rocketeer Build
Build
0 / 5 / 0 / 0 / 7 / 7 / 7 / 7
Description
I managed to get 1 Mil points using this build on 4 Teams. Pairs Best with an Octo Tank.
Launcher
Build
4 / 4 / 0 / 0 / 7 / 7 / 7 / 4
Description
Fire powerful shots with max reload, Bullet speed not required.
This build uses reload points to trade for a more survival-based build.
Pressured Lockdown!
Build
0 / 6 / 1 / 7 / 7 / 7 / 2 / 3
Seismic
Build
3 / 1 / 0 / 5 / 7 / 7 / 5 / 4
Auto Turret
Build
2 / 2 / 0 / 7 / 7 / 7 / 7 / 1
5 Snipers
Build
0 / 0 / 0 / 7 / 7 / 7 / 5 / 7
Middle Holder Teams
Build
1 / 5 / 2 / 6 / 6 / 6 / 6 / 1
Description
Hold the middle and keep other team from leveling. Run from any fight. Get kills by accident or by defense.
The Moving Fort
Build
0 / 7 / 0 / 5 / 7 / 7 / 7 / 0
Description
This build is good for when you're defending a fleet of tanks. If you're assaulting an enemy, do not brute force it as it leads to your downfall. Also, bring tanks which can penetrate bullets so that you won't get hit by the enemy as easily.
Used for hunting down tanks, to kill bullet spammers you have to find blind spots, as long as it is played carefully it can destroy anything.
Fast Rammer
Build
7 / 7 / 7 / 5 / 0 / 0 / 7 / 0
Flying Goat
Build
6 / 5 / 7 / 0 / 0 / 7 / 1 / 7
Description
Boosters always remind me of goats: fast, frisky, and sometimes annoying.
Gun Them Down!
Build
2 / 2 / 0 / 3 / 7 / 6 / 6 / 7
Ram and Slam
Build
3 / 7 / 3 / 0 / 2 / 4 / 7 / 7
Description
Ram peaple with bullets and your self!
Kill, Rest, Repeat
Build
0 / 3 / 0 / 2 / 7 / 7 / 7 / 7
Description
A fast build that chases after tanks and pecks them with it's low speed high damage bullets
Ram N' Spam
Build
6 / 6 / 5 / 0 / 2 / 7 / 5 / 2
Description
A slower build for the booster which is capable of both ramming other tanks and using a semi-bullet shield. Avoid engaging faster tanks, heavily bullet-shielded tanks, and smashers as they will kill you. Also approach bullet spammers with caution as they probably have a greater firepower than yourself.
The Trolling Booster
Build
4 / 7 / 7 / 0 / 1 / 0 / 7 / 7
Description
When you ram into another ramming Booster the 1 penetration will let you survive by a bit
Good at catching tanks like the Quad tank or those with low penetration builds off guard. If things go awry, it can take some hits and move quickly in order to ensure a safe getaway.
Mockingjay
Build
0 / 0 / 0 / 6 / 7 / 6 / 7 / 7
Description
uhhh... Glass Cannon!
Vandal
Build
3 / 3 / 2 / 2 / 7 / 7 / 7 / 2
Description
Balanced Fighter build. You don't have to do bullet speed but I think it'd help in certain situations, but if you'd like, you could move it into movement speed.
Made by Redostonecraft, this provides a balanced build for Octo Tanks with emphasis on survivability.
The Hurricane
Build
0 / 5 / 0 / 1 / 7 / 7 / 6 / 7
Bullet Storm
Build
2 / 0 / 0 / 7 / 7 / 7 / 7 / 3
Octo Hurricane
Build
2 / 3 / 0 / 0 / 7 / 7 / 7 / 7
Dangerous Thunderstorm
Build
3 / 3 / 0 / 6 / 7 / 6 / 6 / 2
Glass Octo
Build
0 / 0 / 0 / 6 / 7 / 7 / 7 / 6
Hurricane Justin
Build
0 / 5 / 3 / 1 / 6 / 6 / 7 / 5
Description
A hurricane-style build that my friend Justin uses. Customizable, switch high bullet damage and penetration for max health and body damage for an anti-rammer that would surprise Boosters and Smashers, or put more points into penetration and damage for a glass fortress that will keep enemies out and provide nice crowd control in Teams or Domination.
Blizzard
Build
0 / 0 / 5 / 0 / 7 / 7 / 7 / 7
Somewhat Glass Tank
Build
0 / 5 / 0 / 6 / 5 / 6 / 6 / 5
Hurricane
Build
5 / 0 / 0 / 3 / 7 / 7 / 4 / 7
The Tropical Storm
Build
1 / 4 / 0 / 7 / 7 / 7 / 7 / 0
OctoTrool
Build
0 / 0 / 0 / 5 / 7 / 7 / 7 / 7
FLARE´s octo tank
Build
1 / 3 / 0 / 1 / 7 / 7 / 7 / 7
Description
if you want you can swap the health and bullet speed points around. designed for chasing down smaller tanks and creates cover in TDM modes for other players
Octo Farmer
Build
0 / 2 / 0 / 7 / 4 / 7 / 7 / 6
Description
A (glassy) build suitable for peaceful farming of points, especially near the Pentagon Nest. Caution that confrontations are to be avoided. Suitable for use in modes with a base/safety zone, where one can flee to upon danger. Not recommended for modes where fighting against other tanks are unavoidable.
Rammer Hell
Build
0 / 6 / 5 / 3 / 6 / 6 / 6 / 1
Description
I recommend that you have one other teammate in your range if you are on 4-team, 2-team, or any other team mode, because this build doesn't guarantee protection, like everything else. If you are in any other mode though, try working up your skill for this build by battling with lvl 20-30 tanks, because this build is, again, a little hard to manage.
The Wall
Build
6 / 6 / 0 / 0 / 7 / 7 / 7 / 0
Description
Not very offensive, but keeps you and your teammates safe(ish)
The build allows you to track your enemies down (the Auto Turret shows tanks that are off-screen) and kill them easily. As a Gunner, it still has its weakness: low penetration. That’s why you should avoid the Twin branch (except if they are low on health). Surprisingly, you can out-trade Destroyers and Hybrids, both the bullet damage ones and the rammer ones. Other tank types should be no problem because of your speed and bullet rain. It’s recommend to stay with Machine Gun until level 45 but you can go Gunner at level 30. Useful in all game modes but best in FFA.
Good for FFA or Maze where you are given VERY little time to take a breather
Living shield
Build
10 / 10 / 6 / 7
Description
Useful in team modes. Follow your teammate and cover him from enemy bullets with your tank. In case of drone using enemies, you can approach them so that they'll attack you and not your fragile teammate. Maxed out health stats will allow you to receive that damage with no sweat in most cases.